Jason Wood, Principal Consultant | August 18, 2020
A couple of years ago I wrote a post on how to set up an authenticating reverse proxy using Apache and Azure AD. While that's still a viable option, time and technology have moved on a bit which presents some newer, easier options for achieving the same outcome if you're using AWS to deliver web services.
The rationale hasn't changed - reducing the attack surface for services intended for internal consumption only (or authenticated users only) offers significant security benefits. Historically that's been the role of a VPN - to make sure that you provide strong authentication and access control to services only intended to be used by your users. If you're targeting a zero network trust model (or just don't feel like both the server and client-side hassle of configuring VPNs to secure your stuff), this type of authenticating load balancer approach provides some easy building blocks for the transition of historically internal-only services to be made externally available in a secure manner.
I'm not going to go through all of the security benefits of this approach, but the main one is preventing unauthenticated users on the Internet from getting any access to your services, including application sign-in pages that would typically be available to any user. This dramatically reduces the potential impact of application or server vulnerabilities by limiting their potential to be exploited to authenticated users. I'm not suggesting you don't need to patch, but the urgency with which you need to do it significantly decreases if the only potential attackers are your authenticated users.
Tying the authentication into Azure AD also has some significant upsides, particularly if you're licensed for Azure AD P1 or P2. This will allow you to very quickly and simply tie user and platform risk into your authentication decisions in addition to now "standard" controls such as multi-factor authentication. With about 15 minutes of integration effort you can create an incredibly powerful authentication and coarse-grained authorisation gateway.
In our deployment of this approach at Fortian, we also use OIDC to authenticate to the web applications that are sitting behind the load balancers. This provides our users with a seamless SSO experience, while allowing us another opportunity to make a more granular assessment of user and device risk at the time access is granted to an individual application.
As a pre-requisite for following along this blog post you will need a server running in AWS with Apache installed to simulate an internal service. It doesn't need any specific configuration other than that, just get a base Ubuntu instance running and then simply do a sudo apt-get install apache2. For the purposes of validating the correct operation you may want to create a security group rule that allows you to validate that the web server is running correctly, but you can also do this locally with wget or curl, and we will cover the security group rules specifically for the load balancer access in this post.
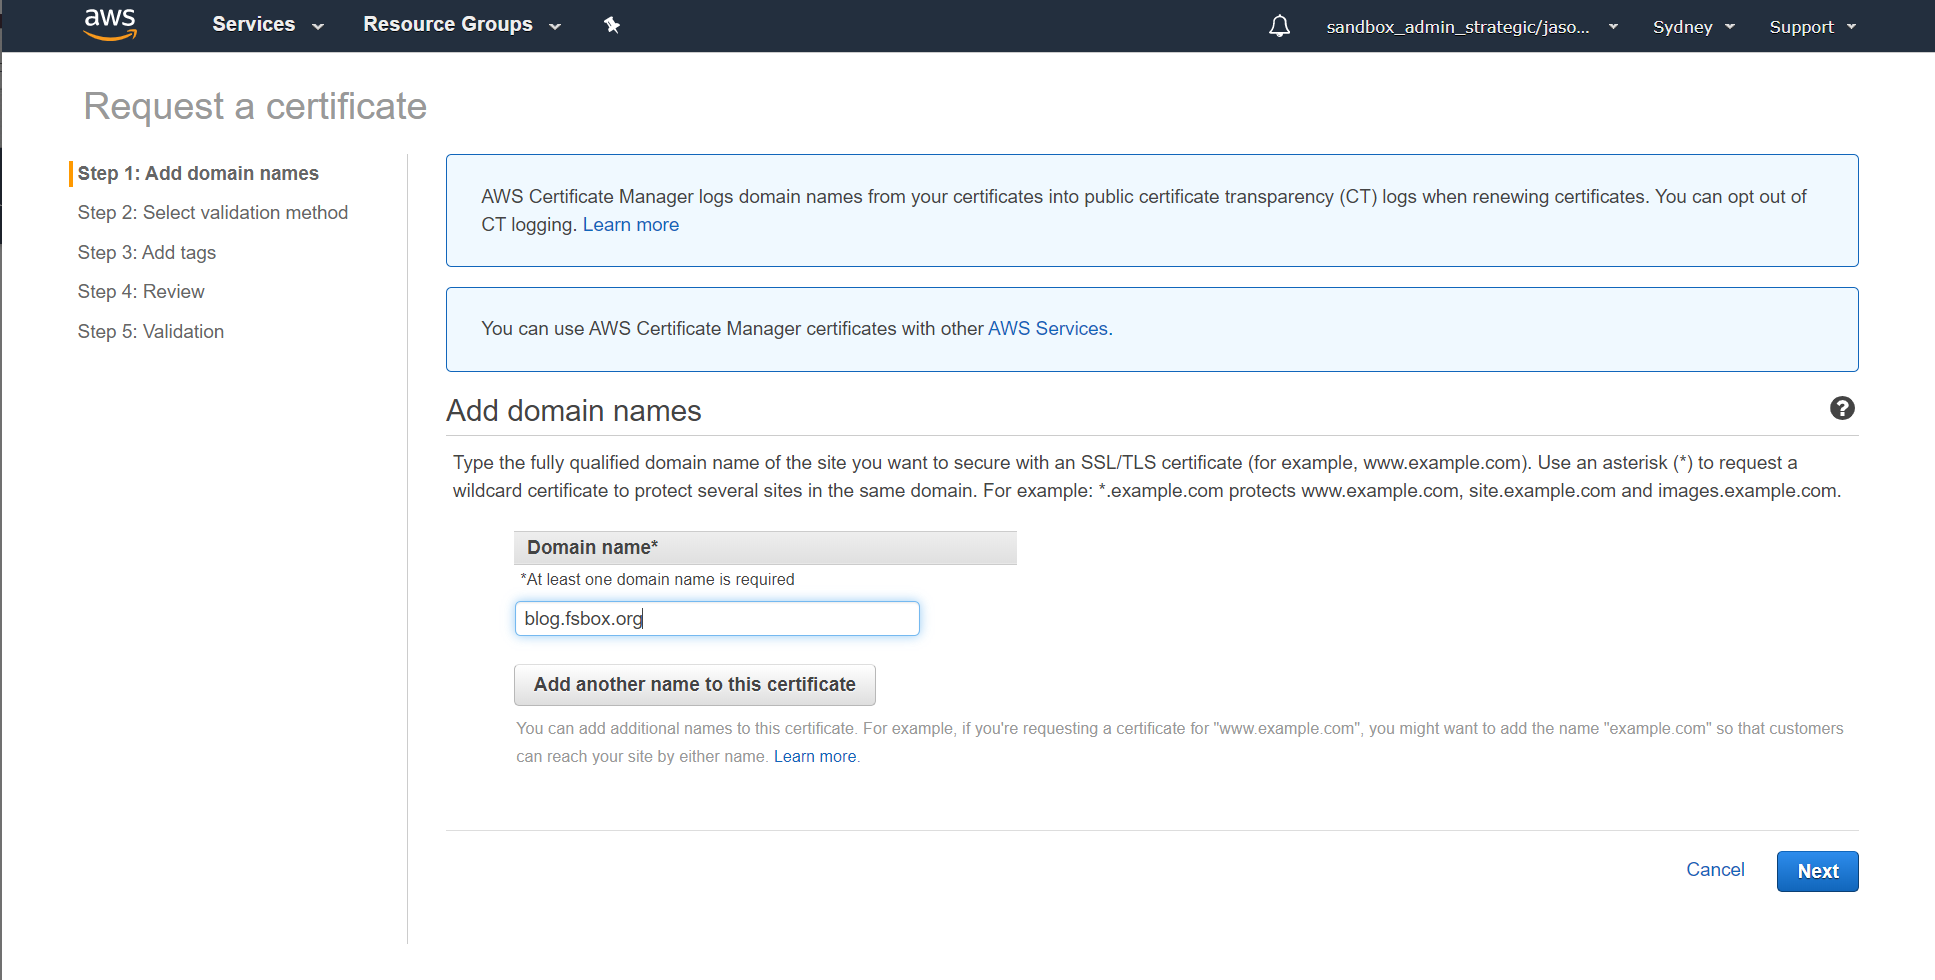
As our load balancer is going to encrypt our traffic with TLS, we need to start by getting a certificate for it using Certificate Manager. Head to Certificate Manager in the AWS console, click "Request Certificate" and enter the DNS name that you are going to use for the load balancer - in our case blog.fsbox.org:
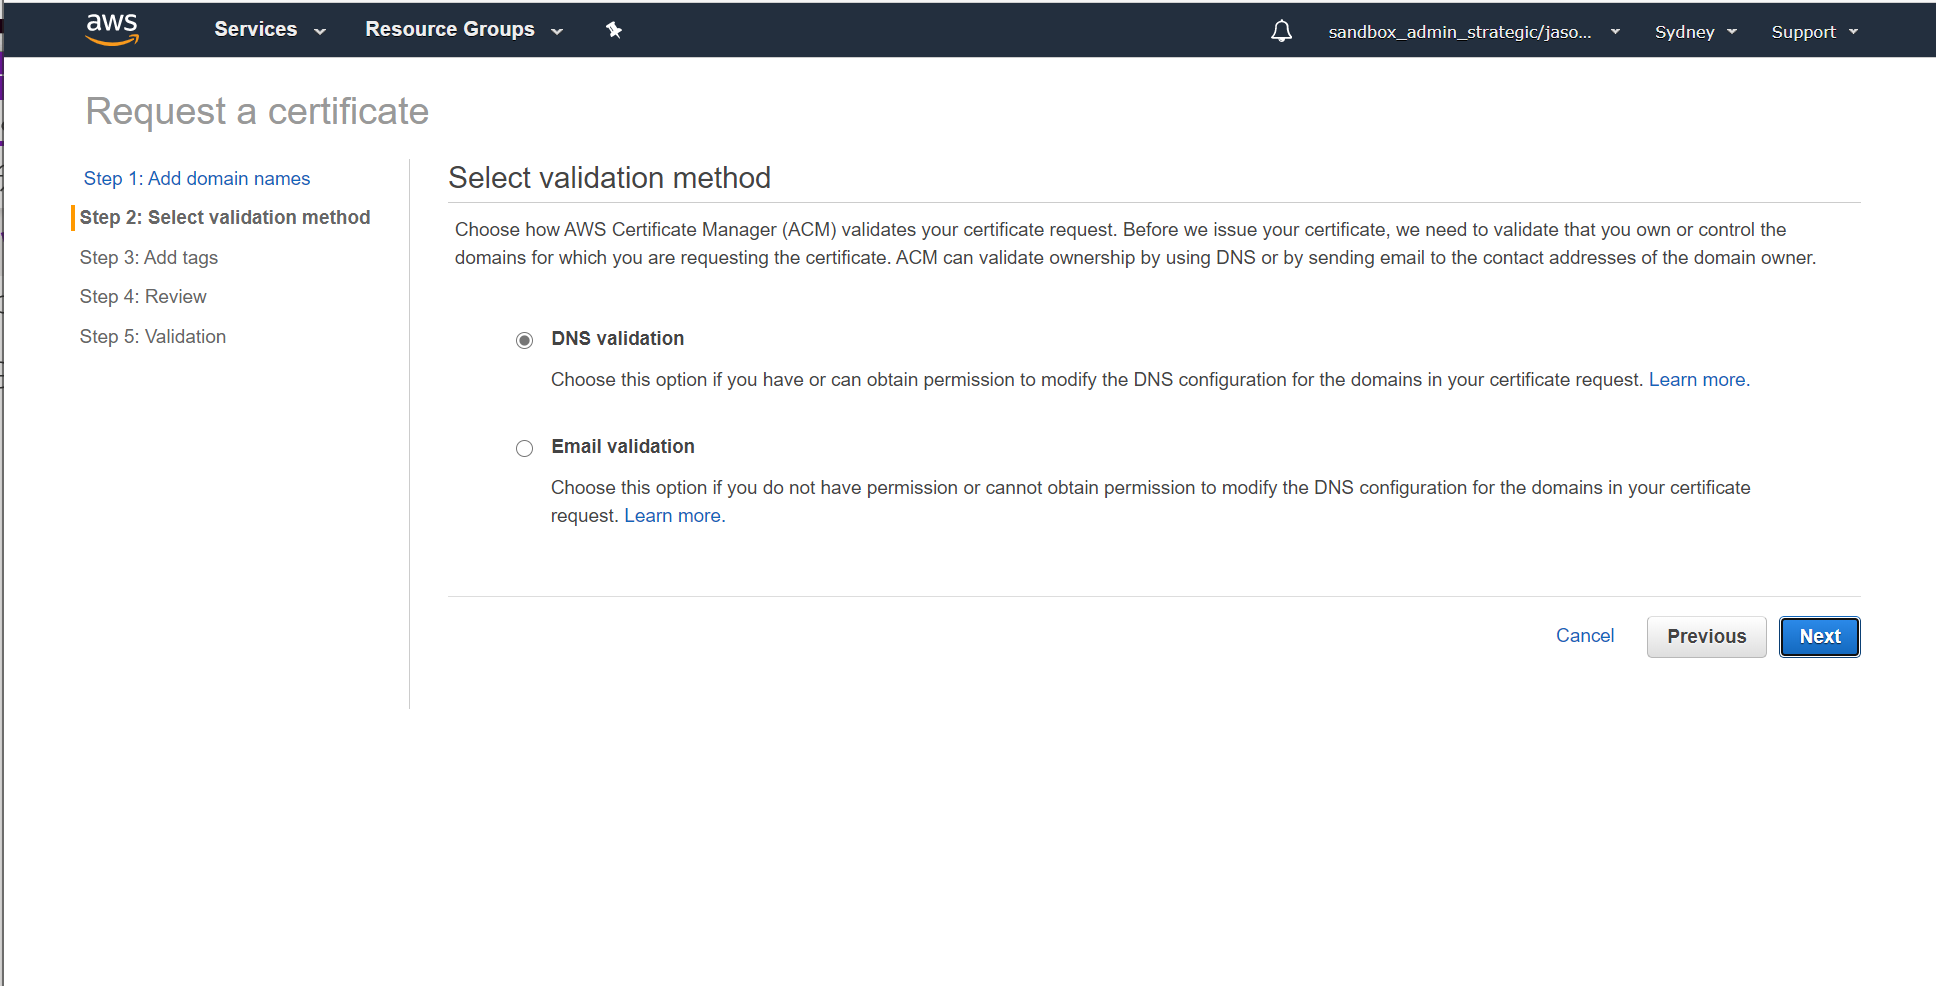
Choose your method for certificate validation. In this demo, we are going to use DNS validation - and the DNS domain (fsbox.org) is already configured in Route53 in the same account:
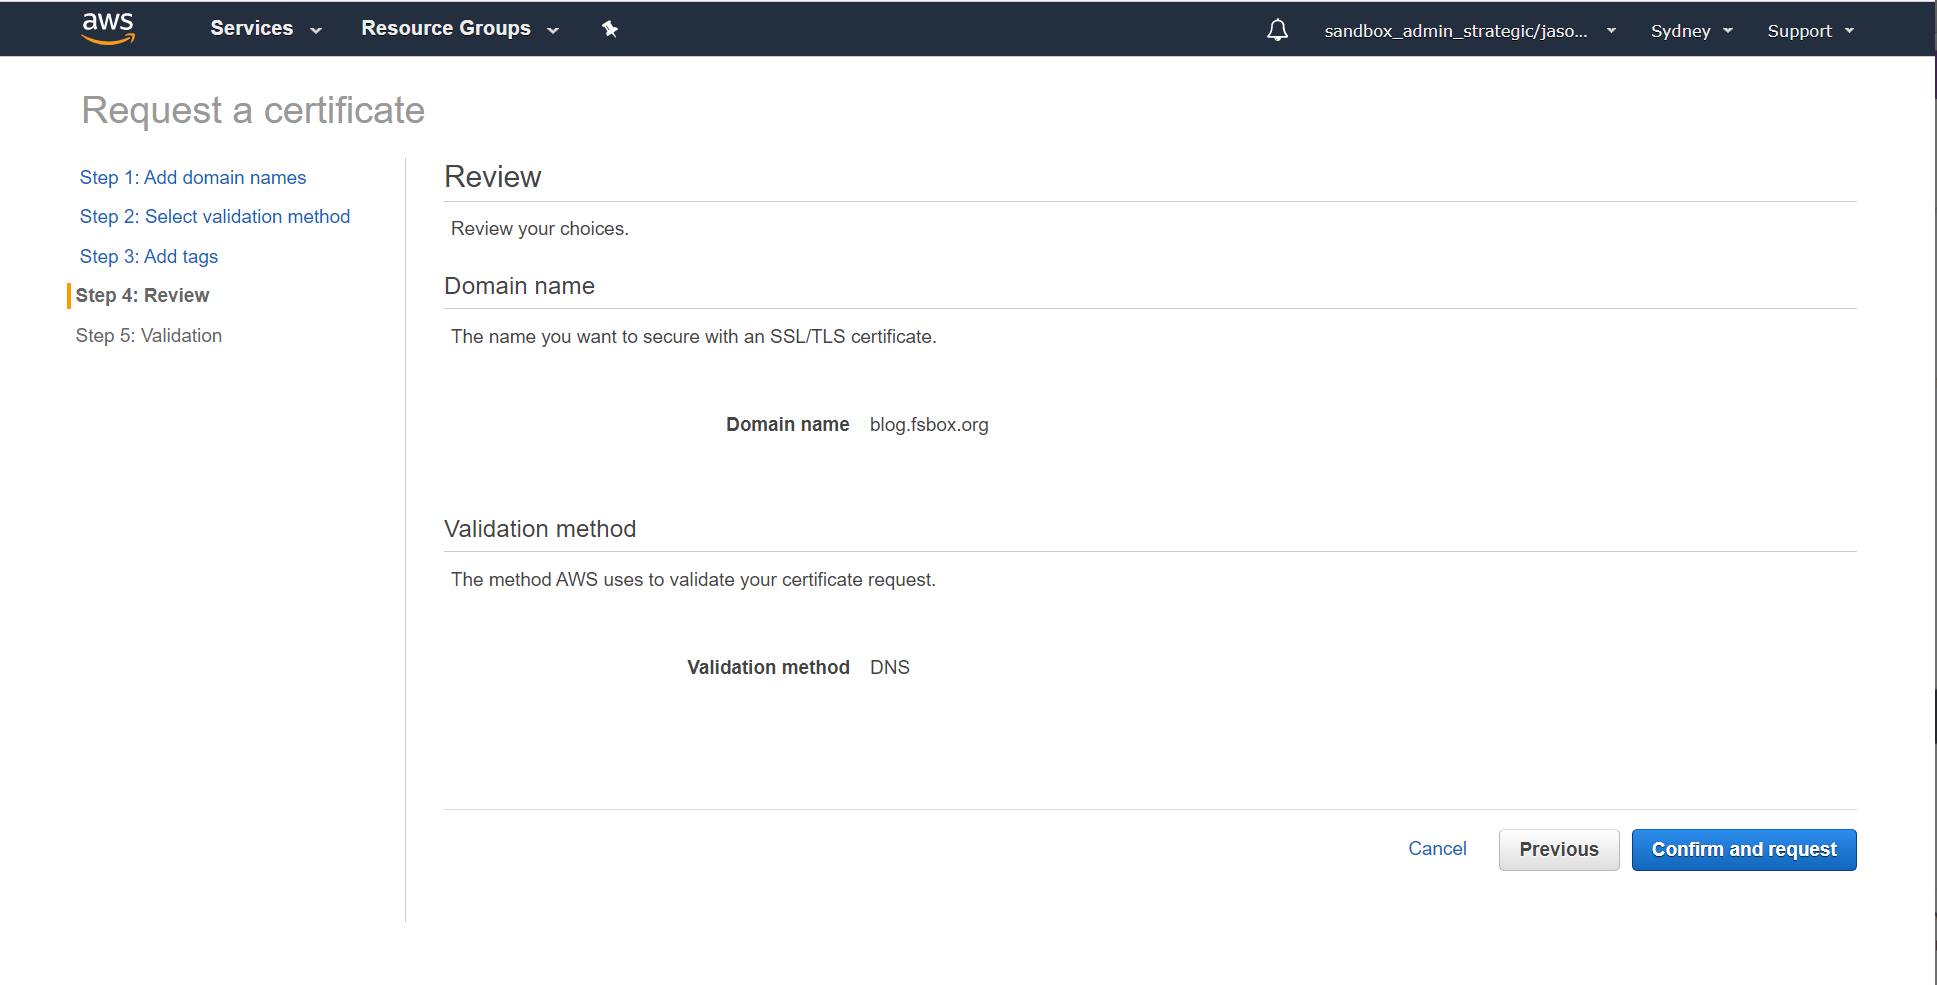
Validate the details and request the certificate:
Because we're using DNS validation and the domain is configured in Route 53 in the same account, we can let AWS create the validation record for us. If you have your DNS mastered elsewhere you'll need to manually complete the DNS validation steps:
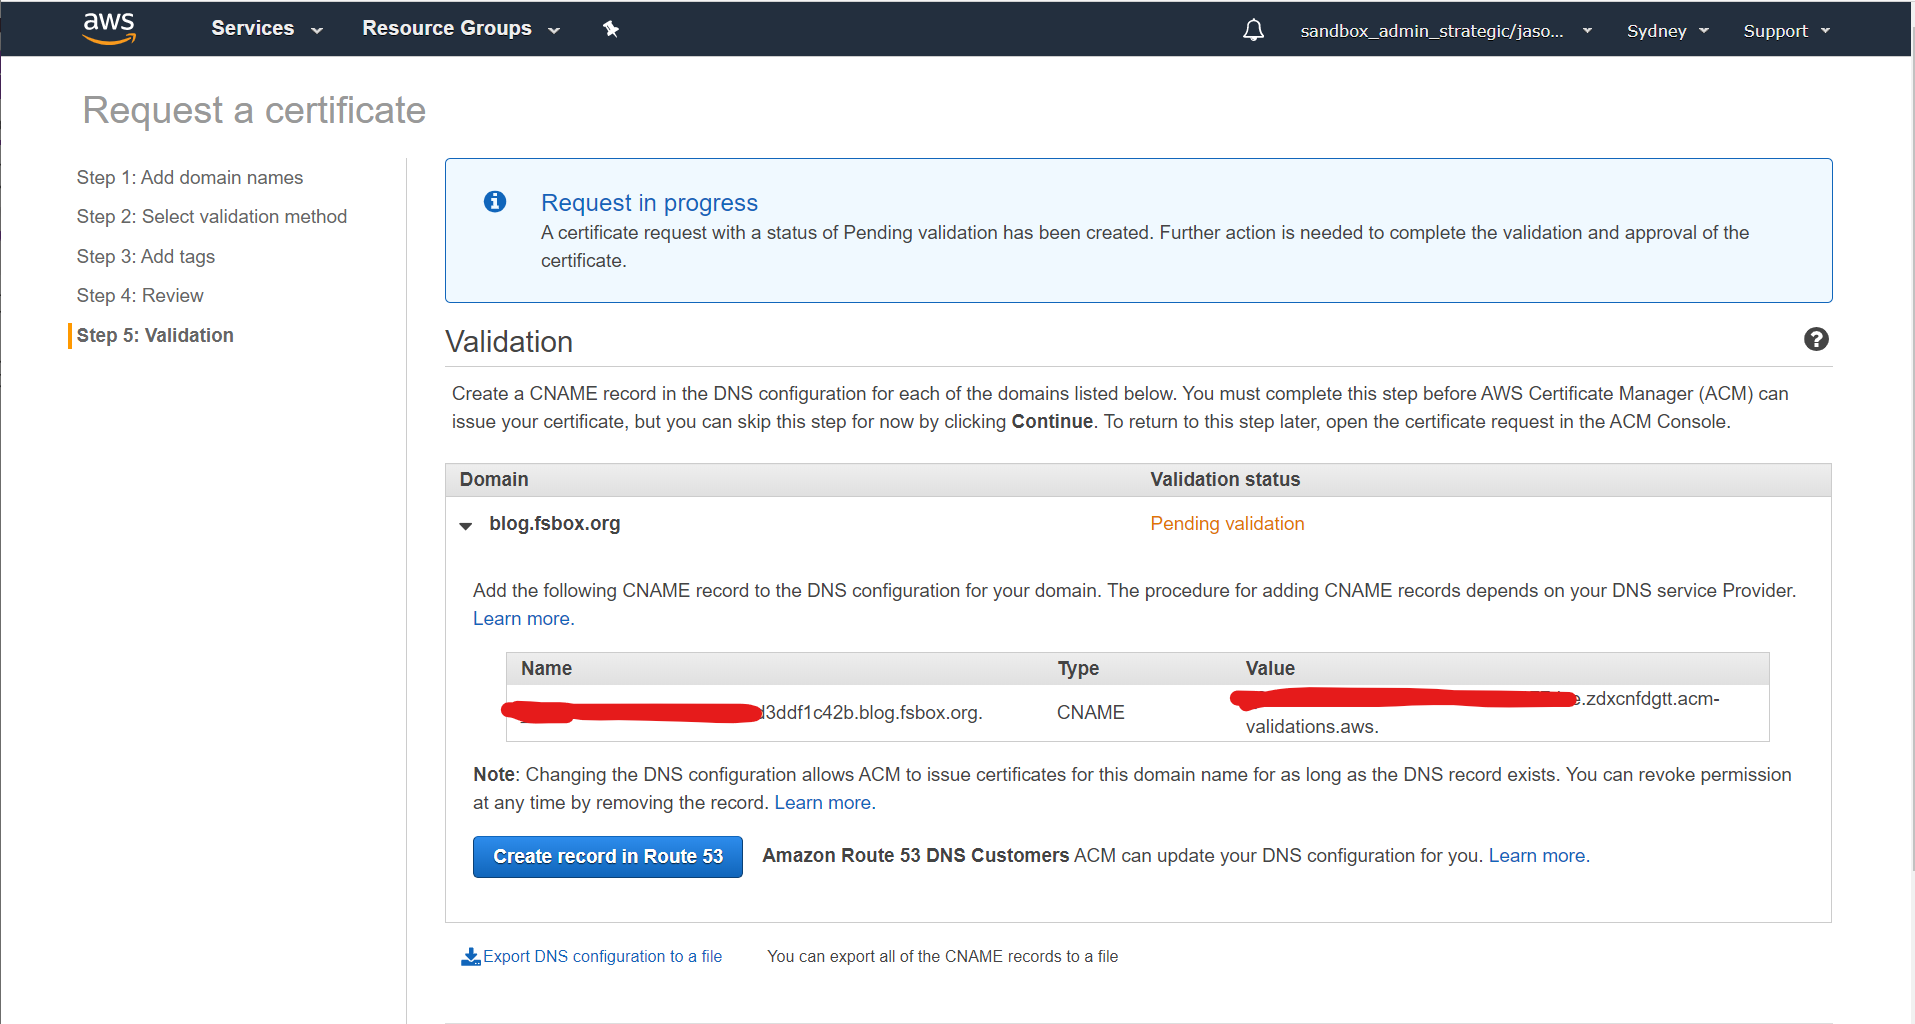
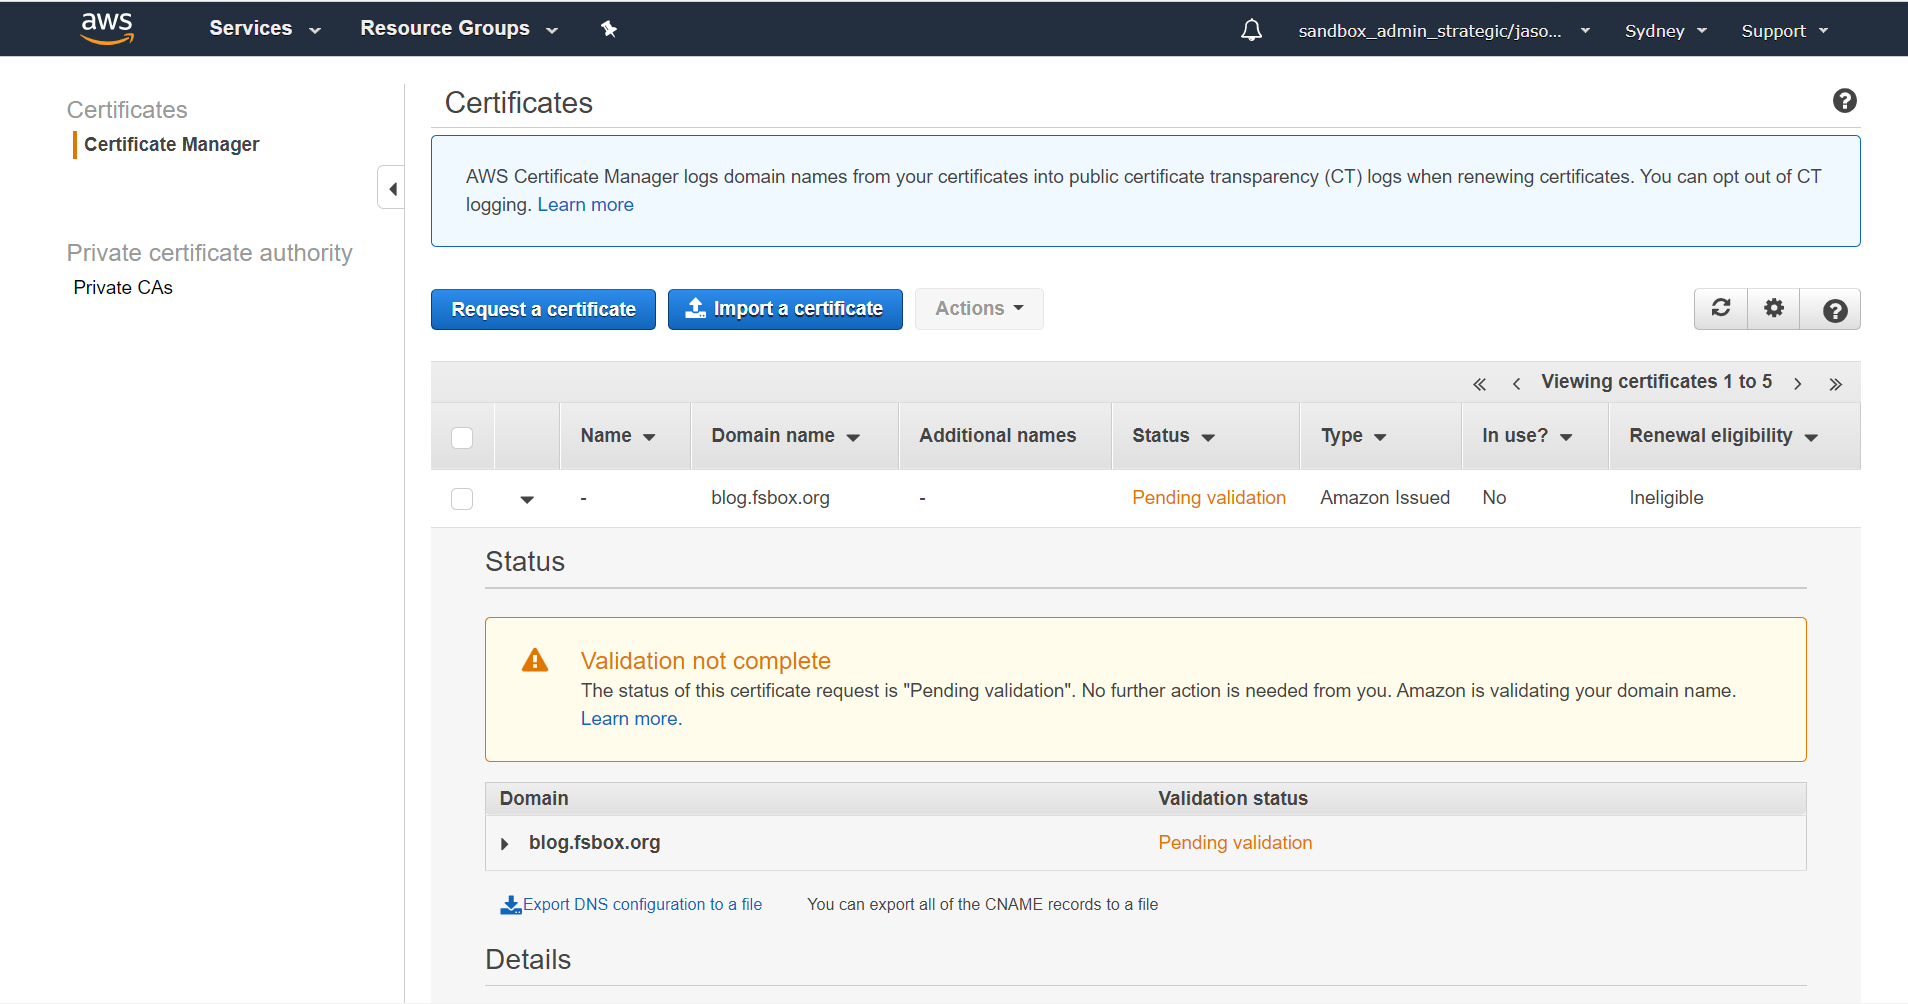
The certificate will initially show up as pending validation:
But if you've done everything right after a couple of minutes you'll see that it's been issued:
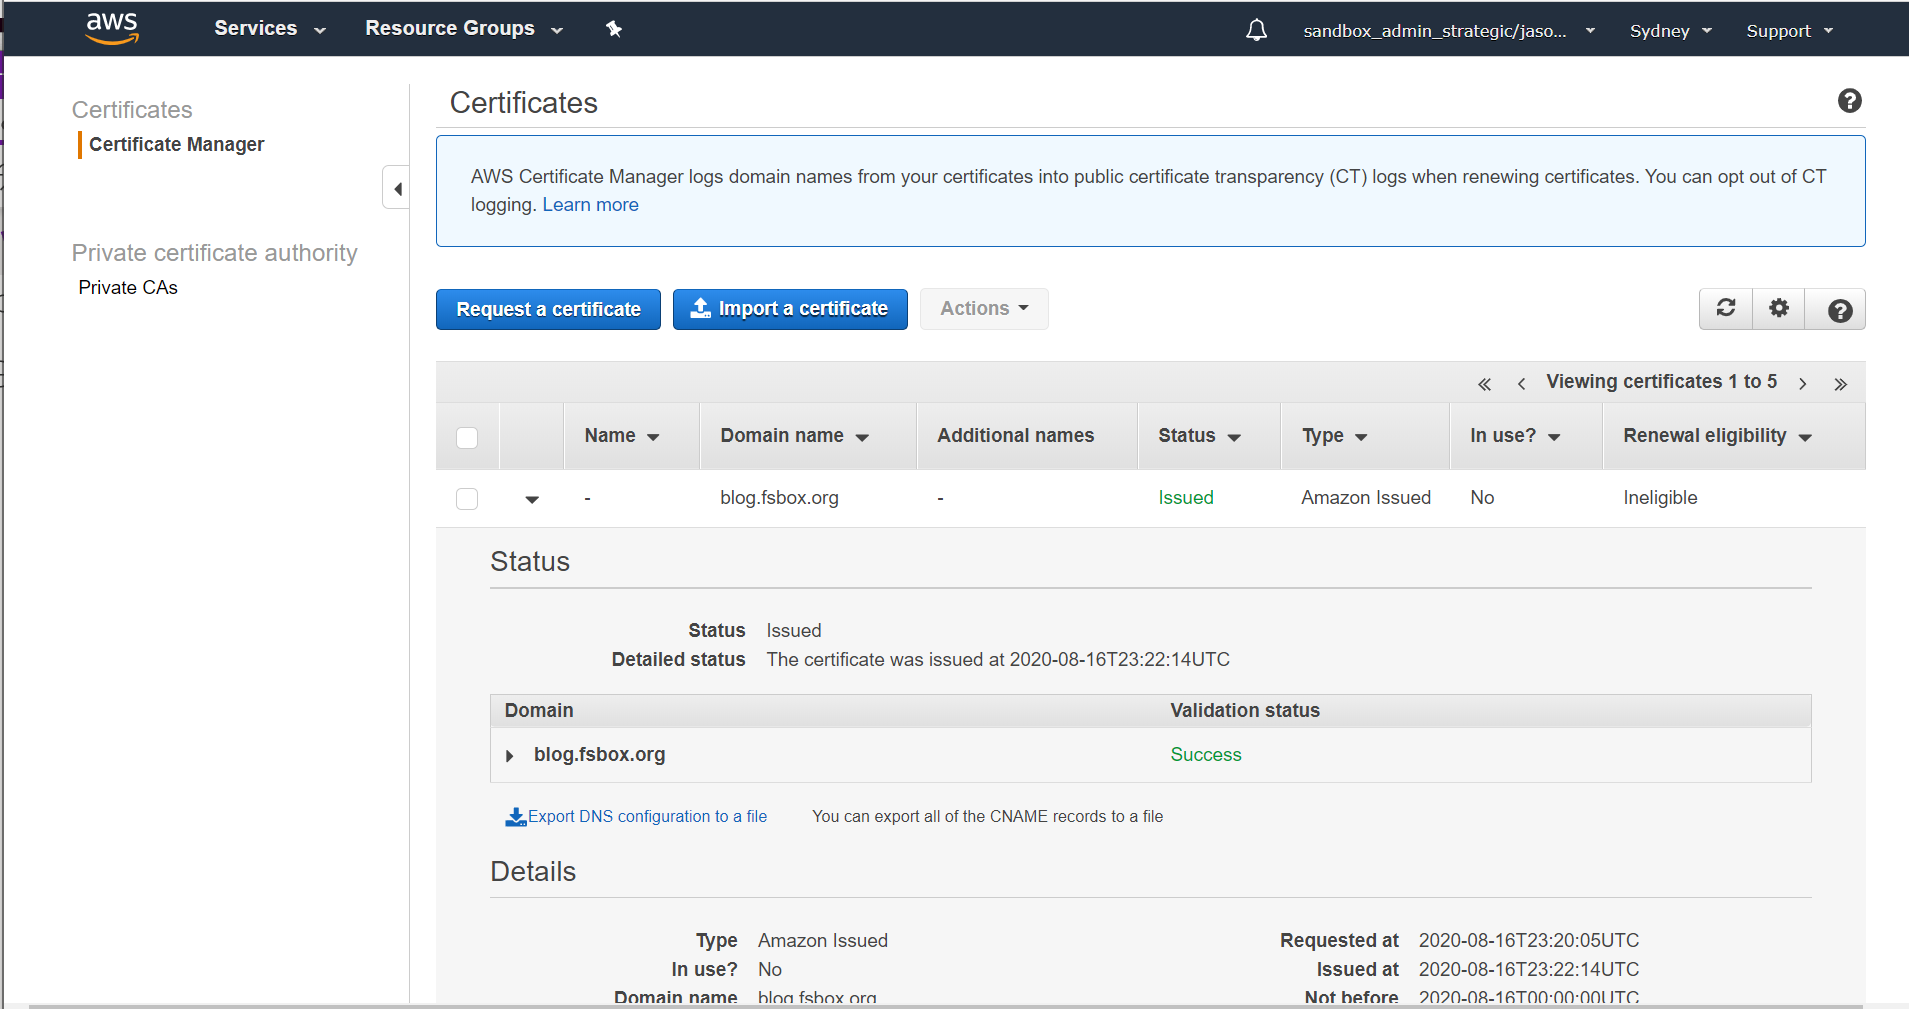
At this point we can move on to the initial configuration for the load balancer
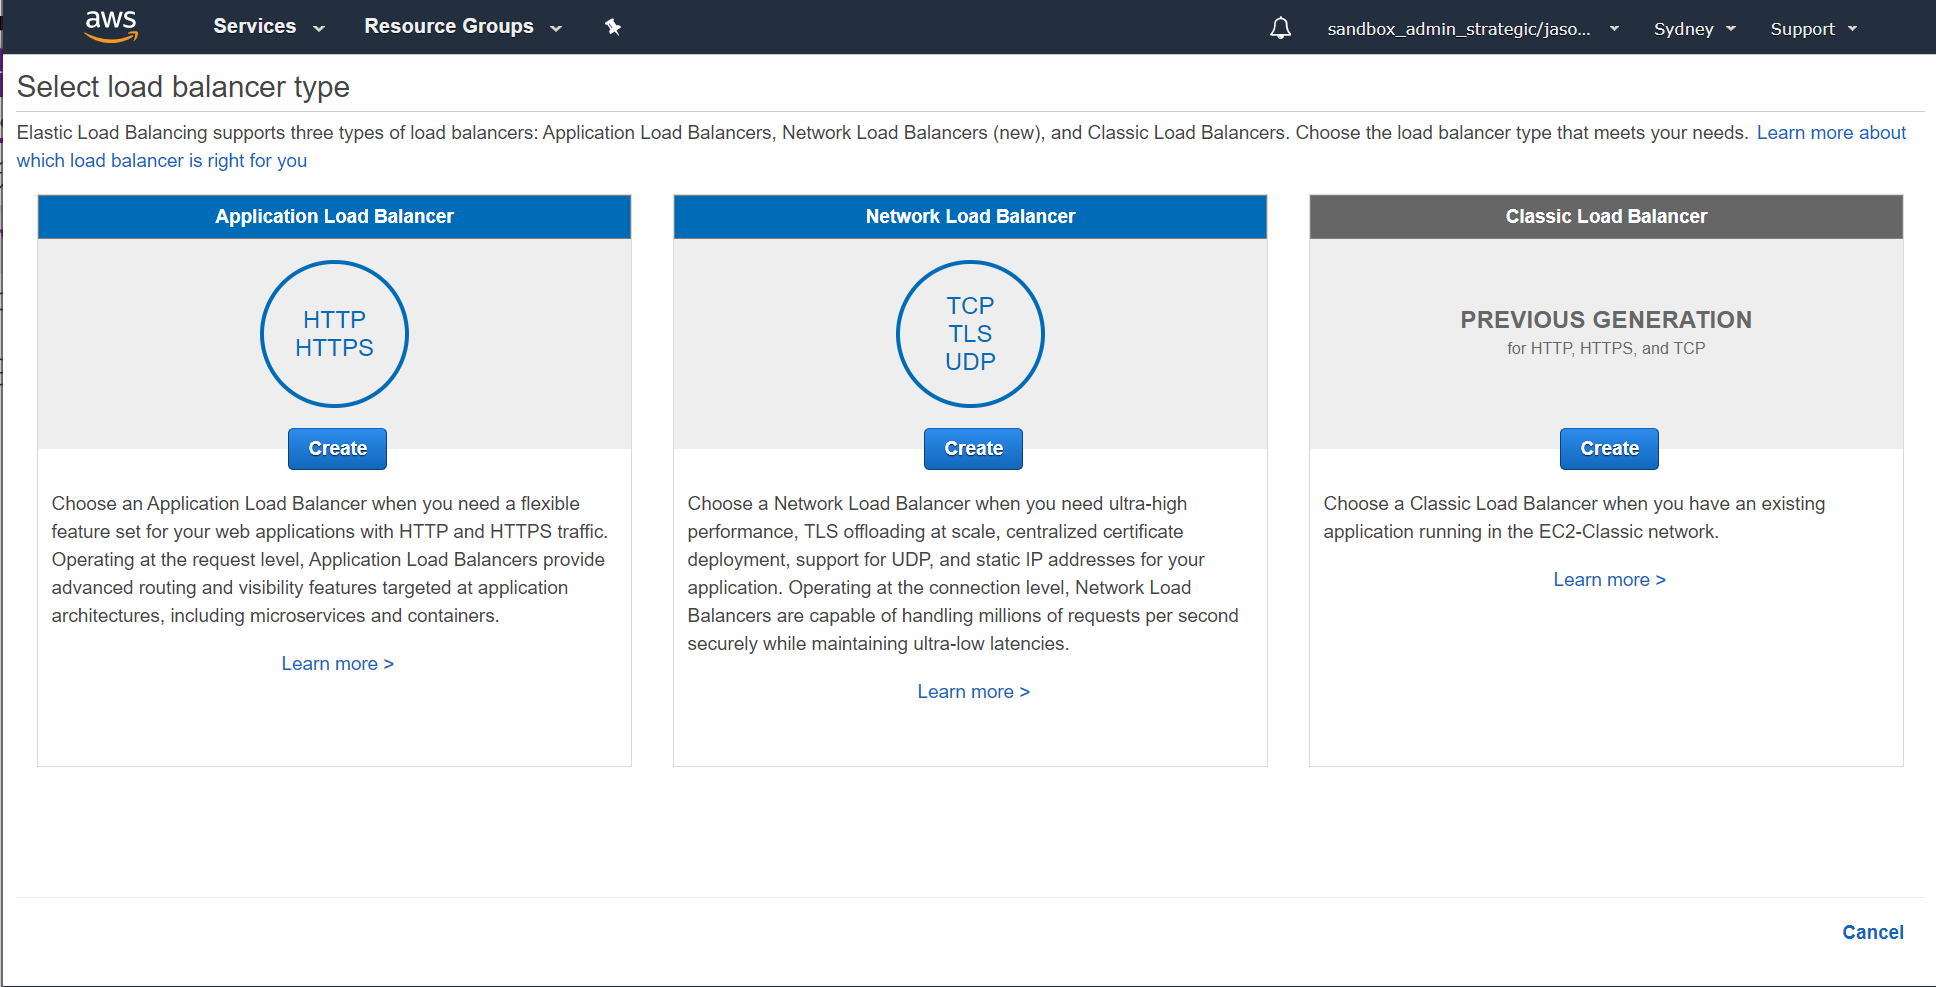
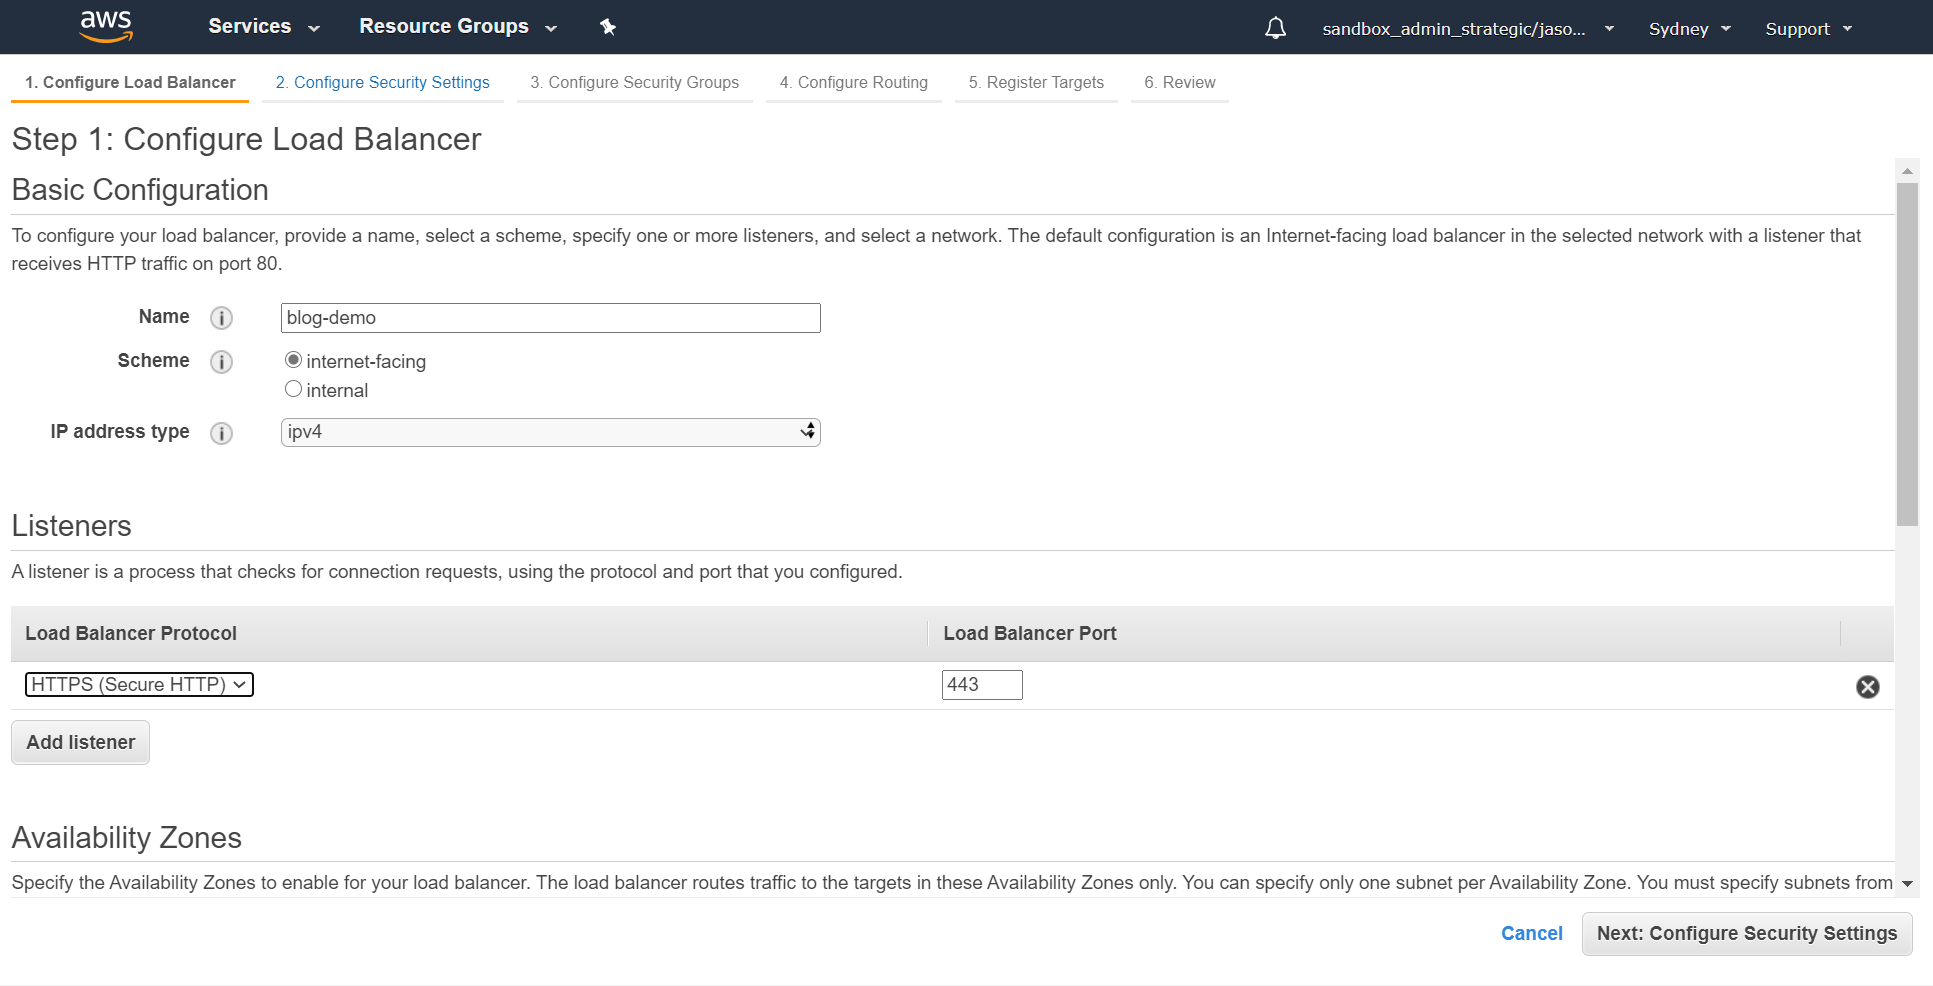
Within the EC2 console, select Load Balancers from the left-hand menu and then hit the "Create load balancer" button. You want to create an Application Load Balancer:
We're going to call ours blog-demo and change the listener to https:
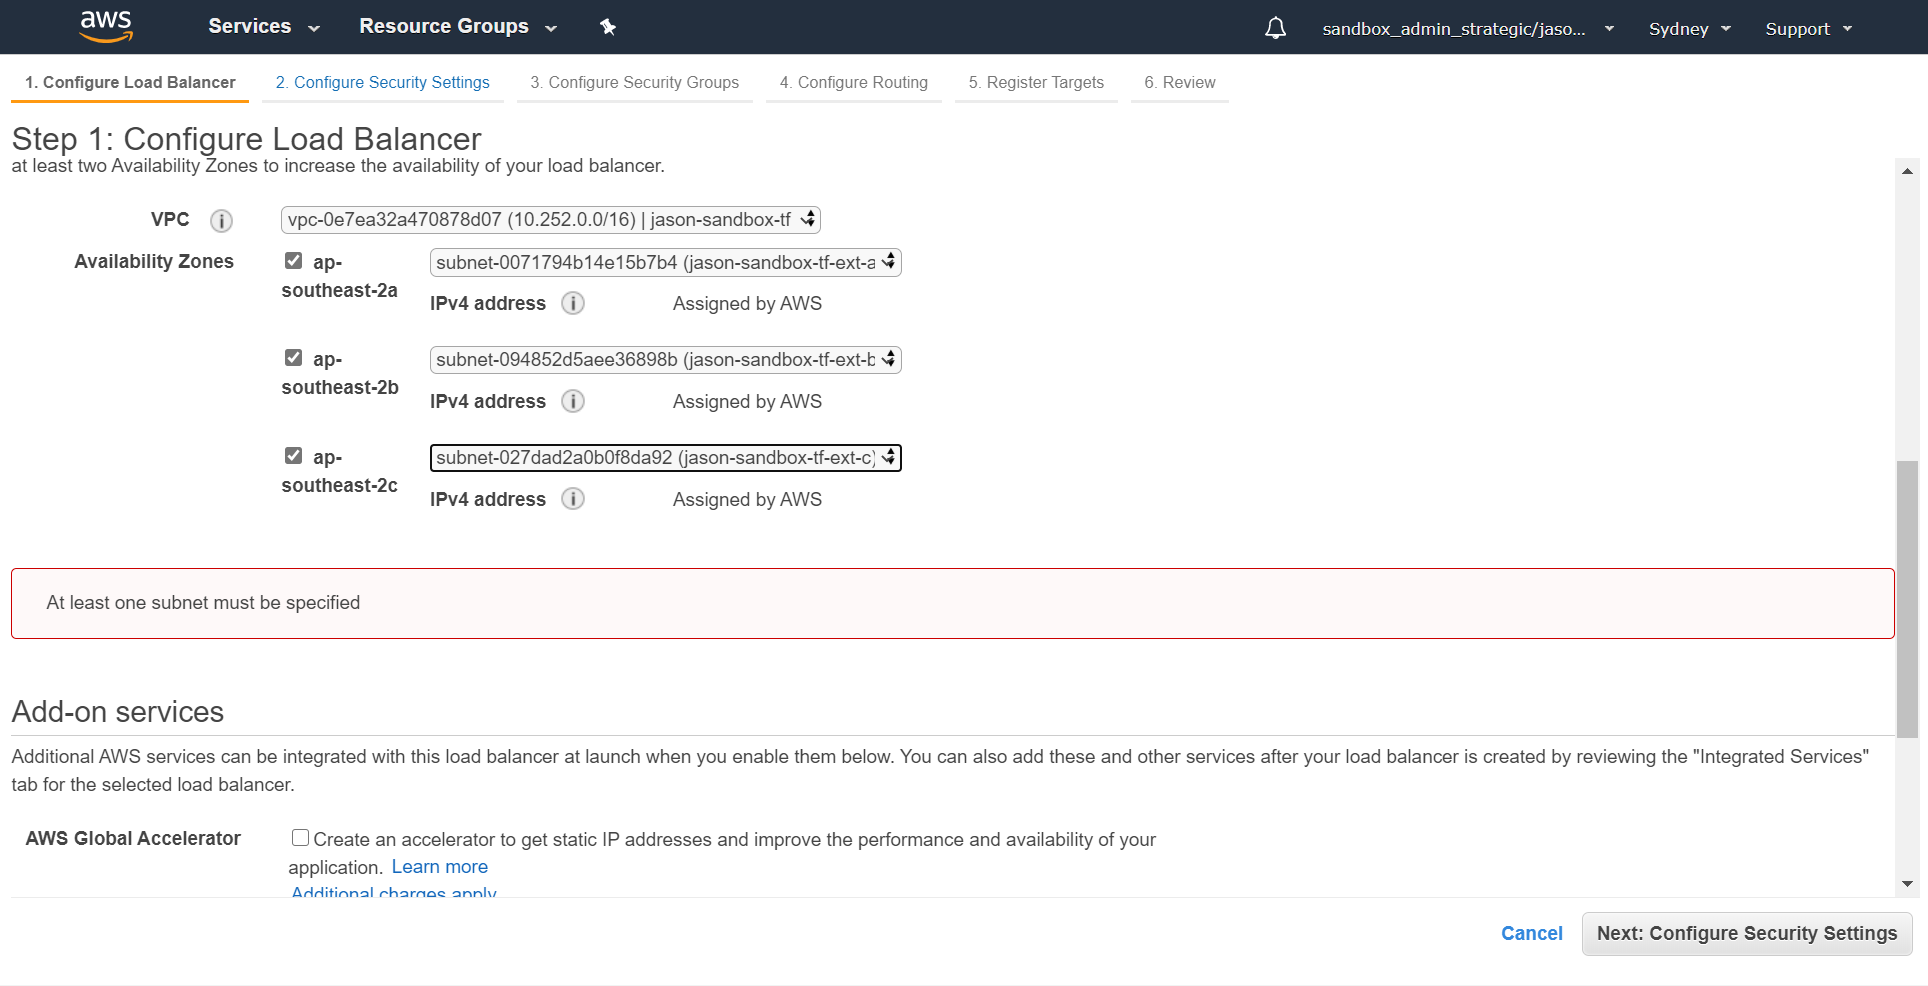
Then scroll down a bit and set up the Availability Zones. In our case it's going into the same VPC as our web server and we're going to enable it across all three AZs:
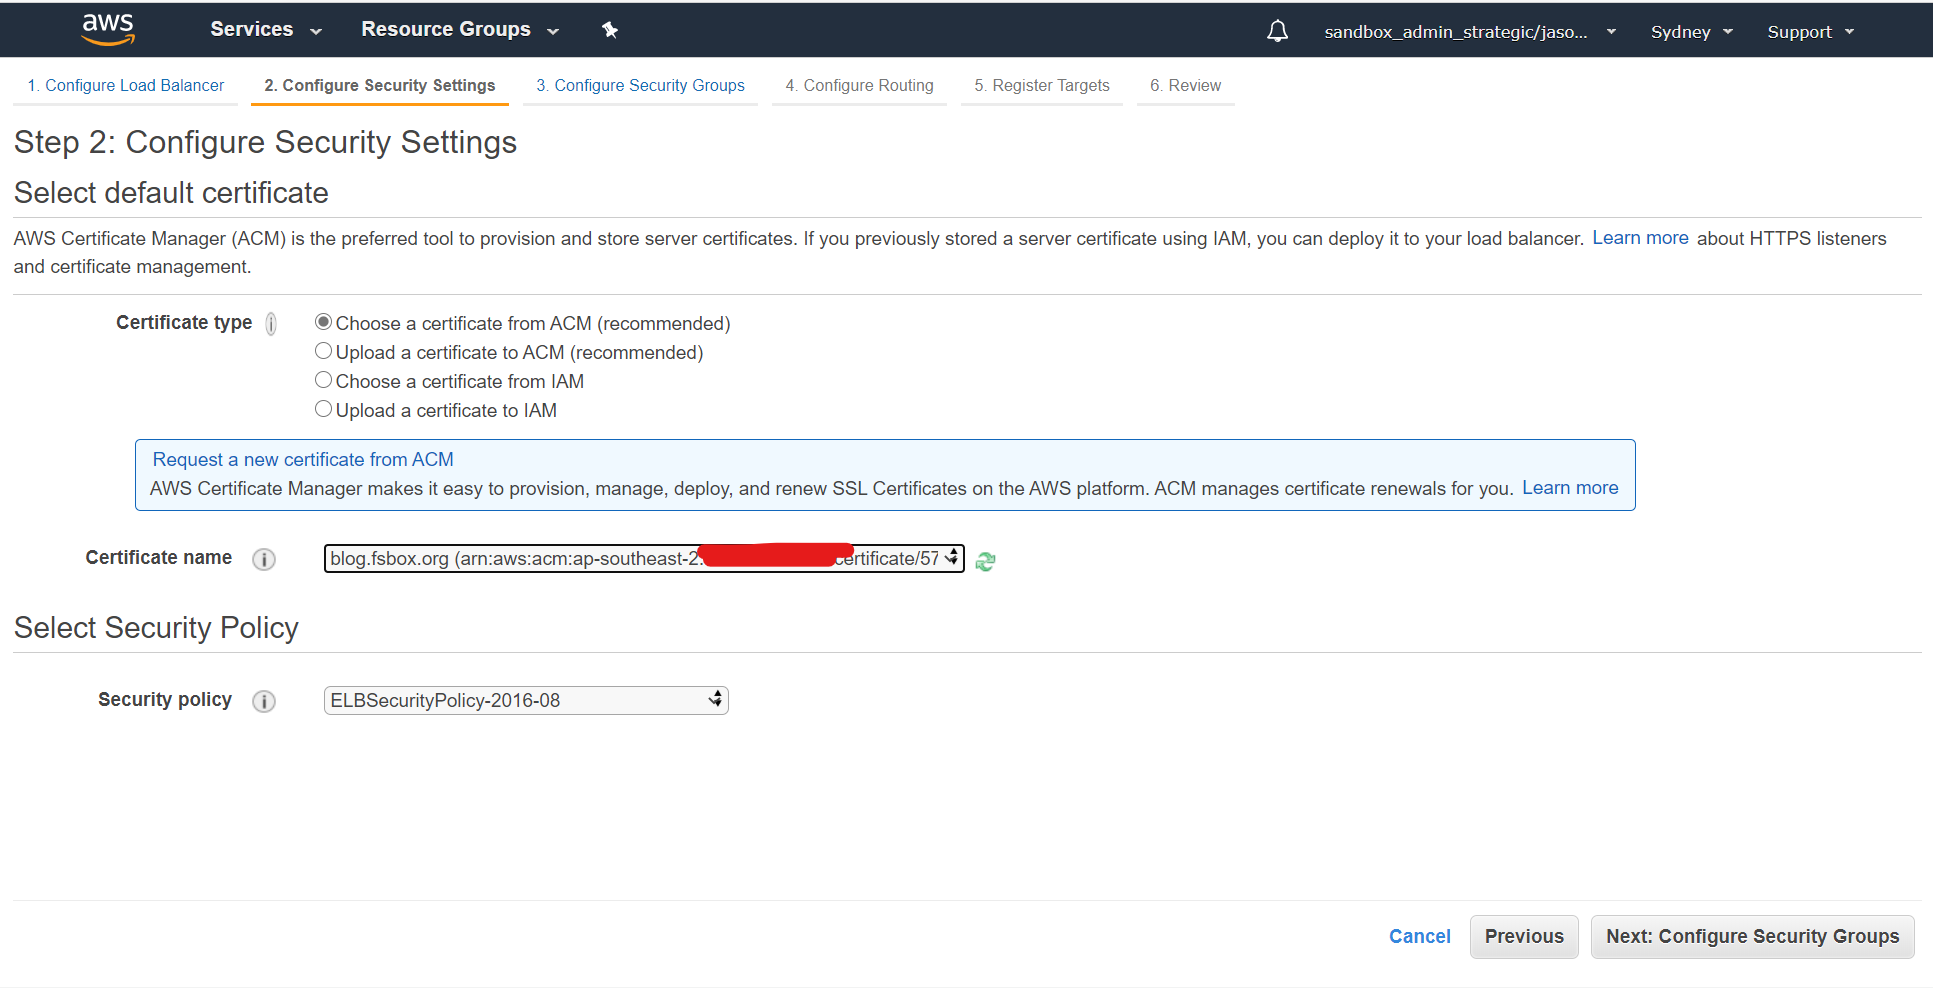
In the security settings select the certificate that you created earlier - in this case blog.fsbox.org:
Create a new security group for the load balancer permitting ports 80 and 443 inbound:
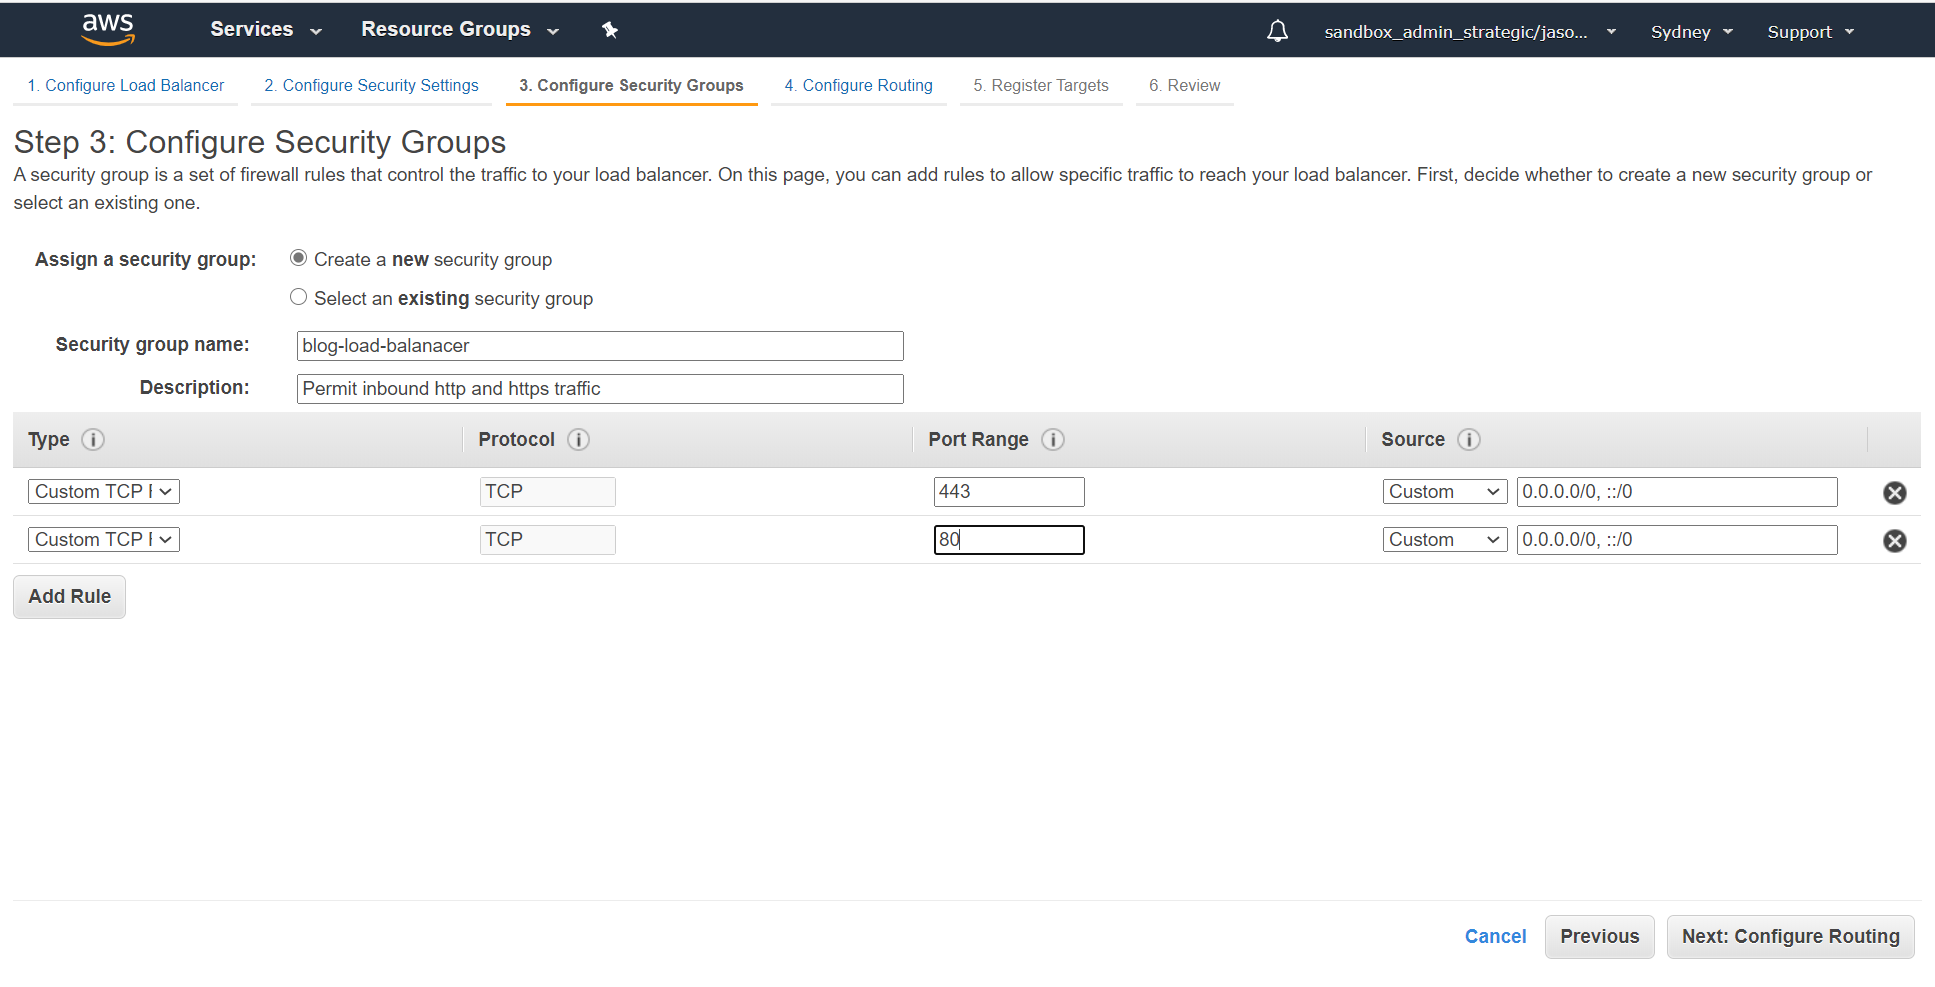
A quick cautionary note here - if you don't have default outbound permit enabled for your security groups (for example you're creating them with Terraform), you will also need to add an outbound rule in permitting access to the webserver.
Within the routing configuration screen create a new target group using HTTP port 80. For the demo we're going to call this "blog":
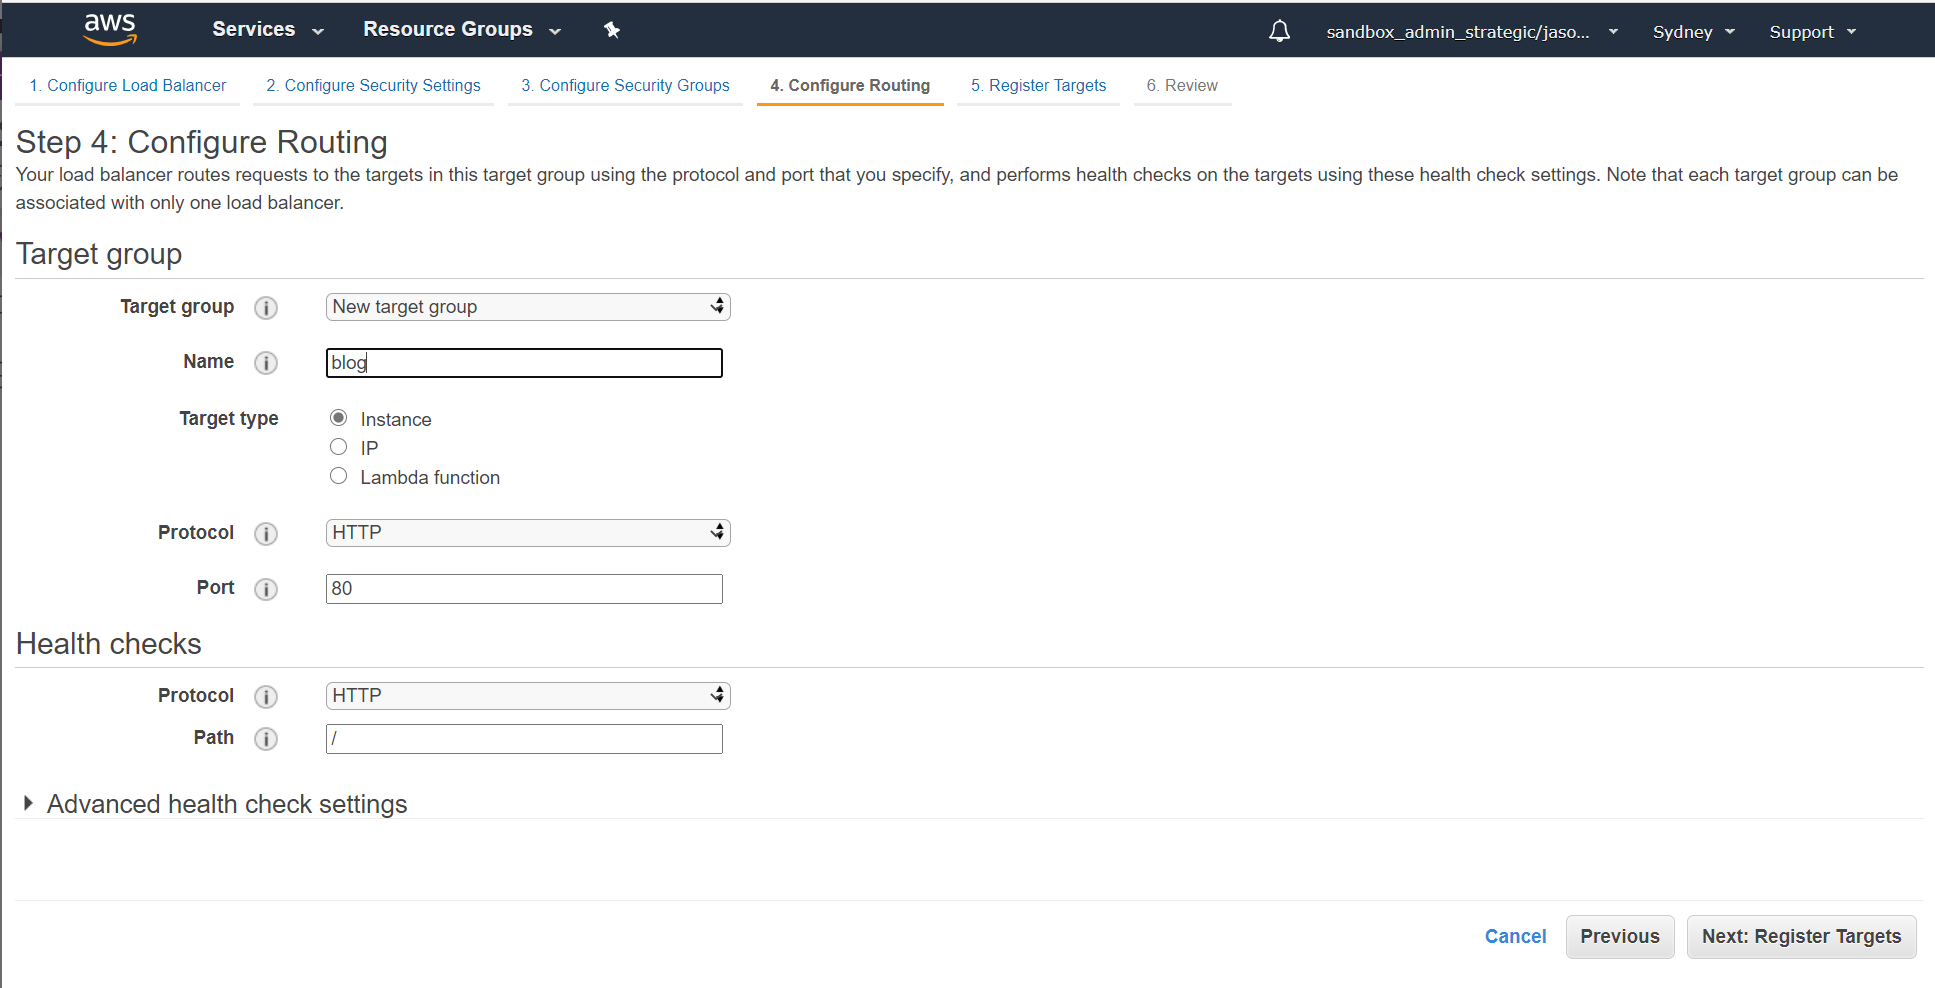
If you're doing this in production, I'd recommend you use TLS for your targets as well to ensure traffic remains encrypted end-to-end, but for the sake of simplicity given that the focus of this blog on configuring the ALB I've stuck with straight HTTP for this.
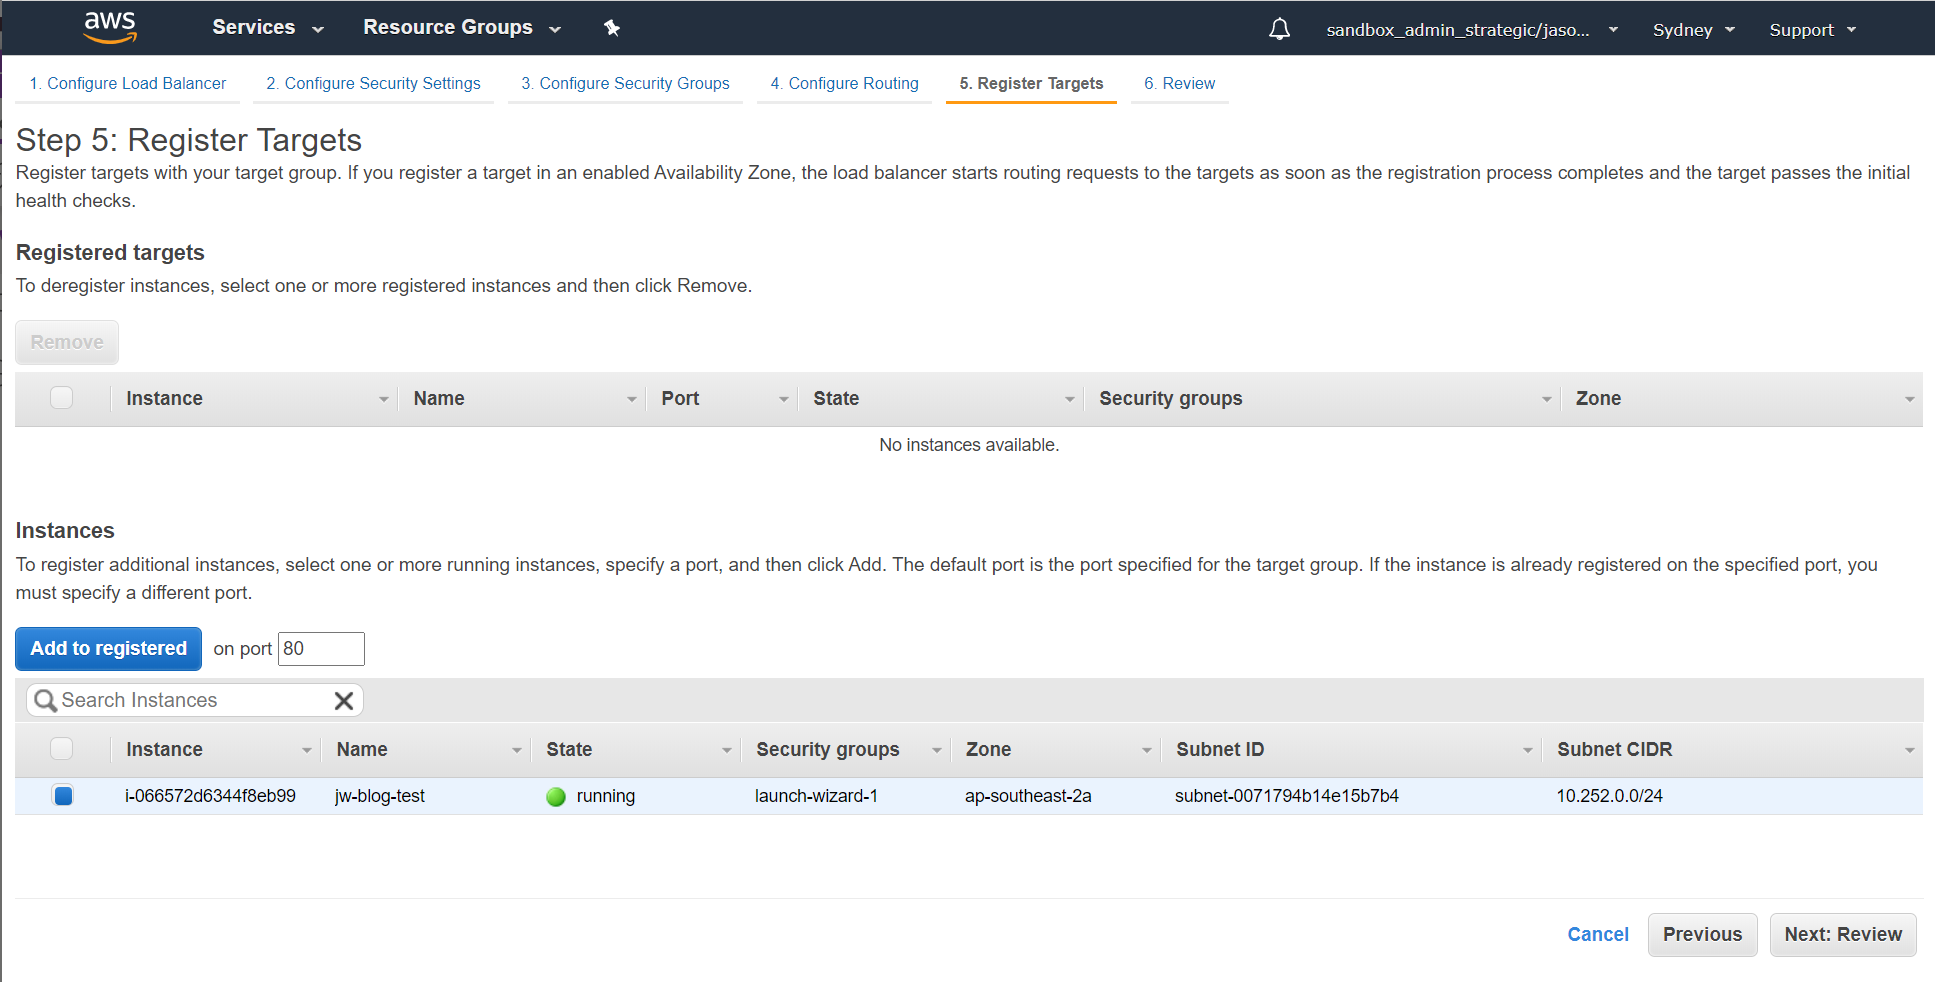
Now add in your test host as the a registered target for the load balancer:
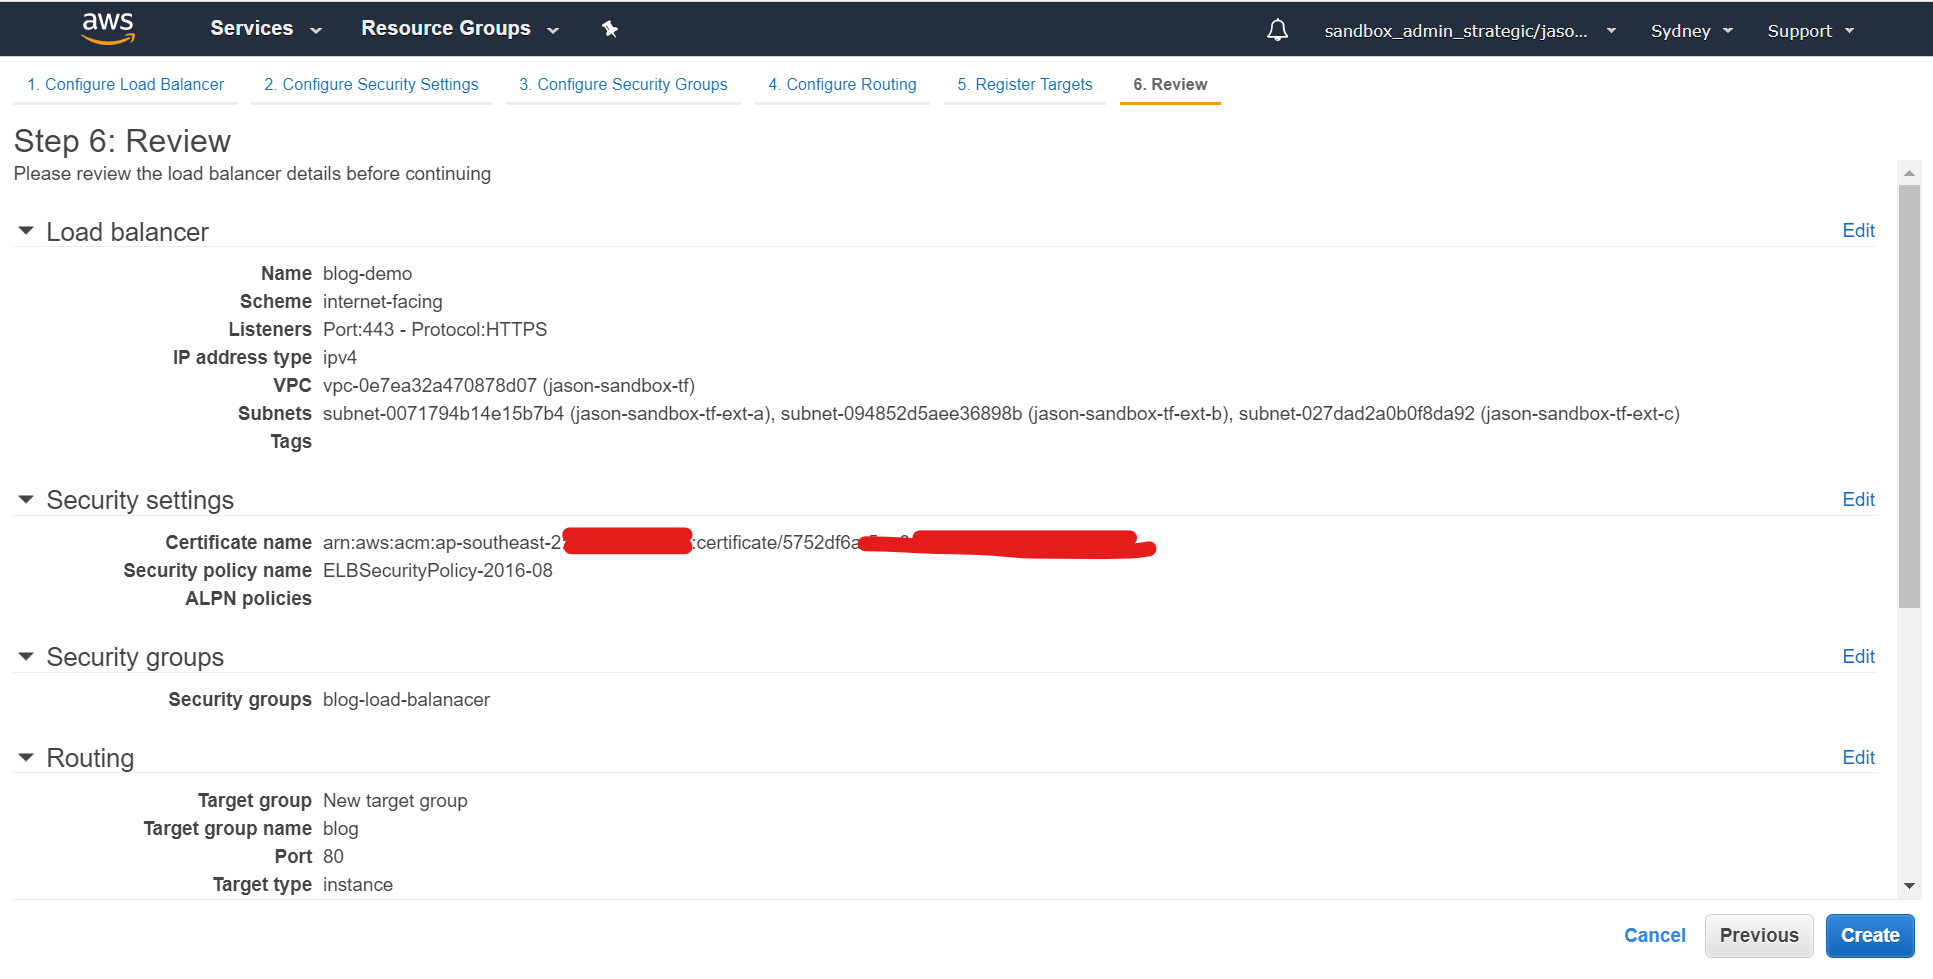
Review everything you've done and hit create:
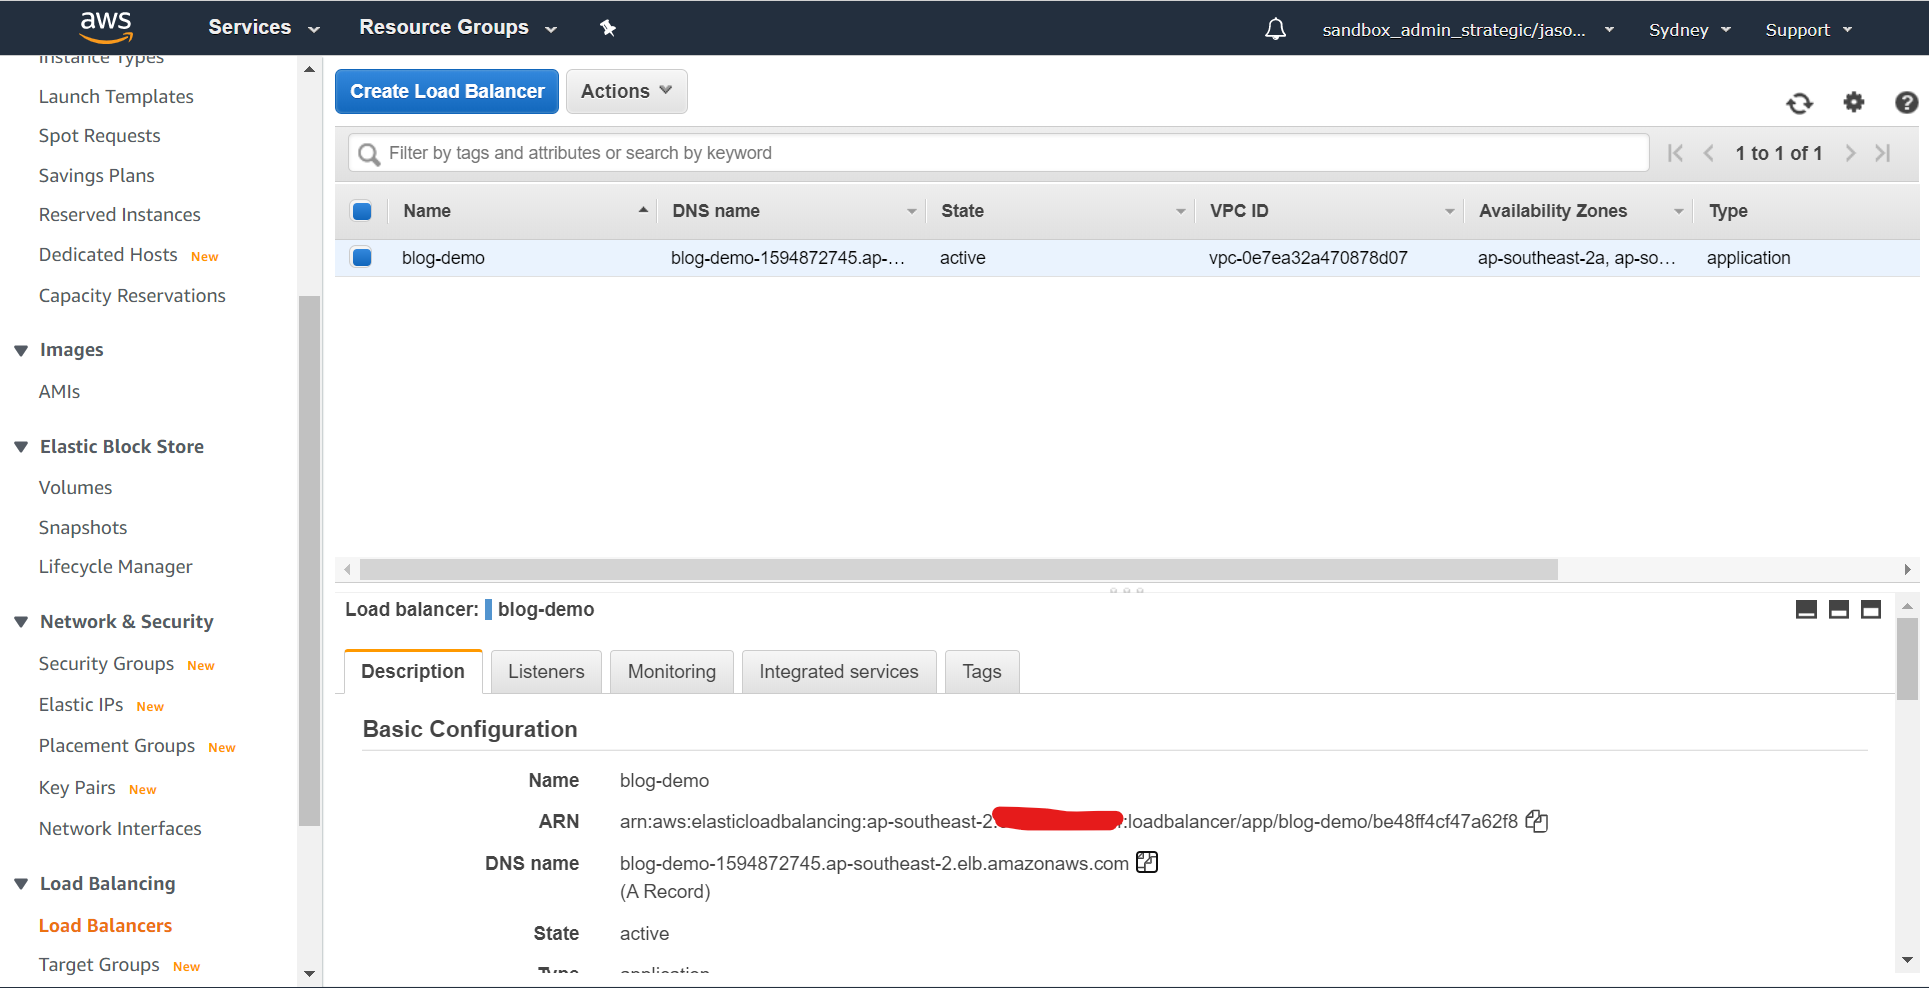
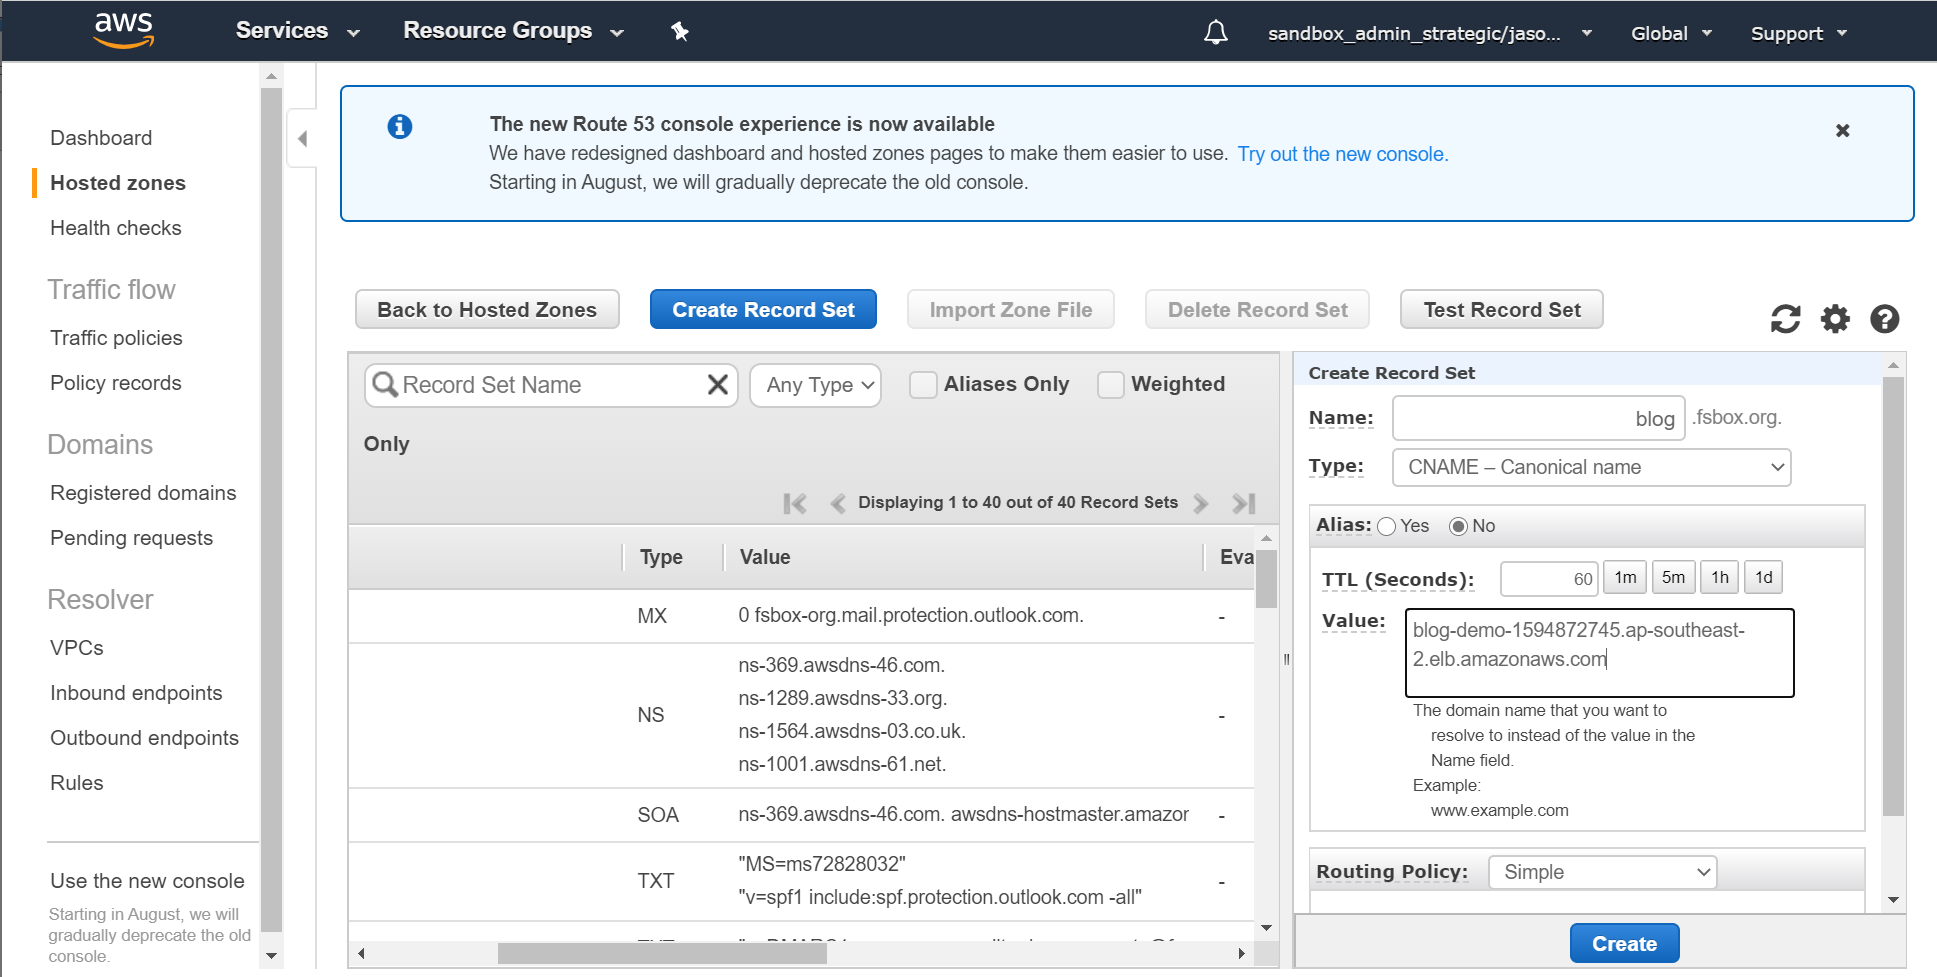
Now we need to get the DNS name for the ALB configured. We are going to create a CNAME record in DNS for the hostname that we're using and for which we've previously created the certificate (in this case blog.fsbox.org) and that record will point at the ALB address that's visible from the main load balancer screen - in this case blog-demo-1594872745.ap-southeast-2.elb.amazonaws.com:
If you're using Route53 it's simply a new record with the above info:
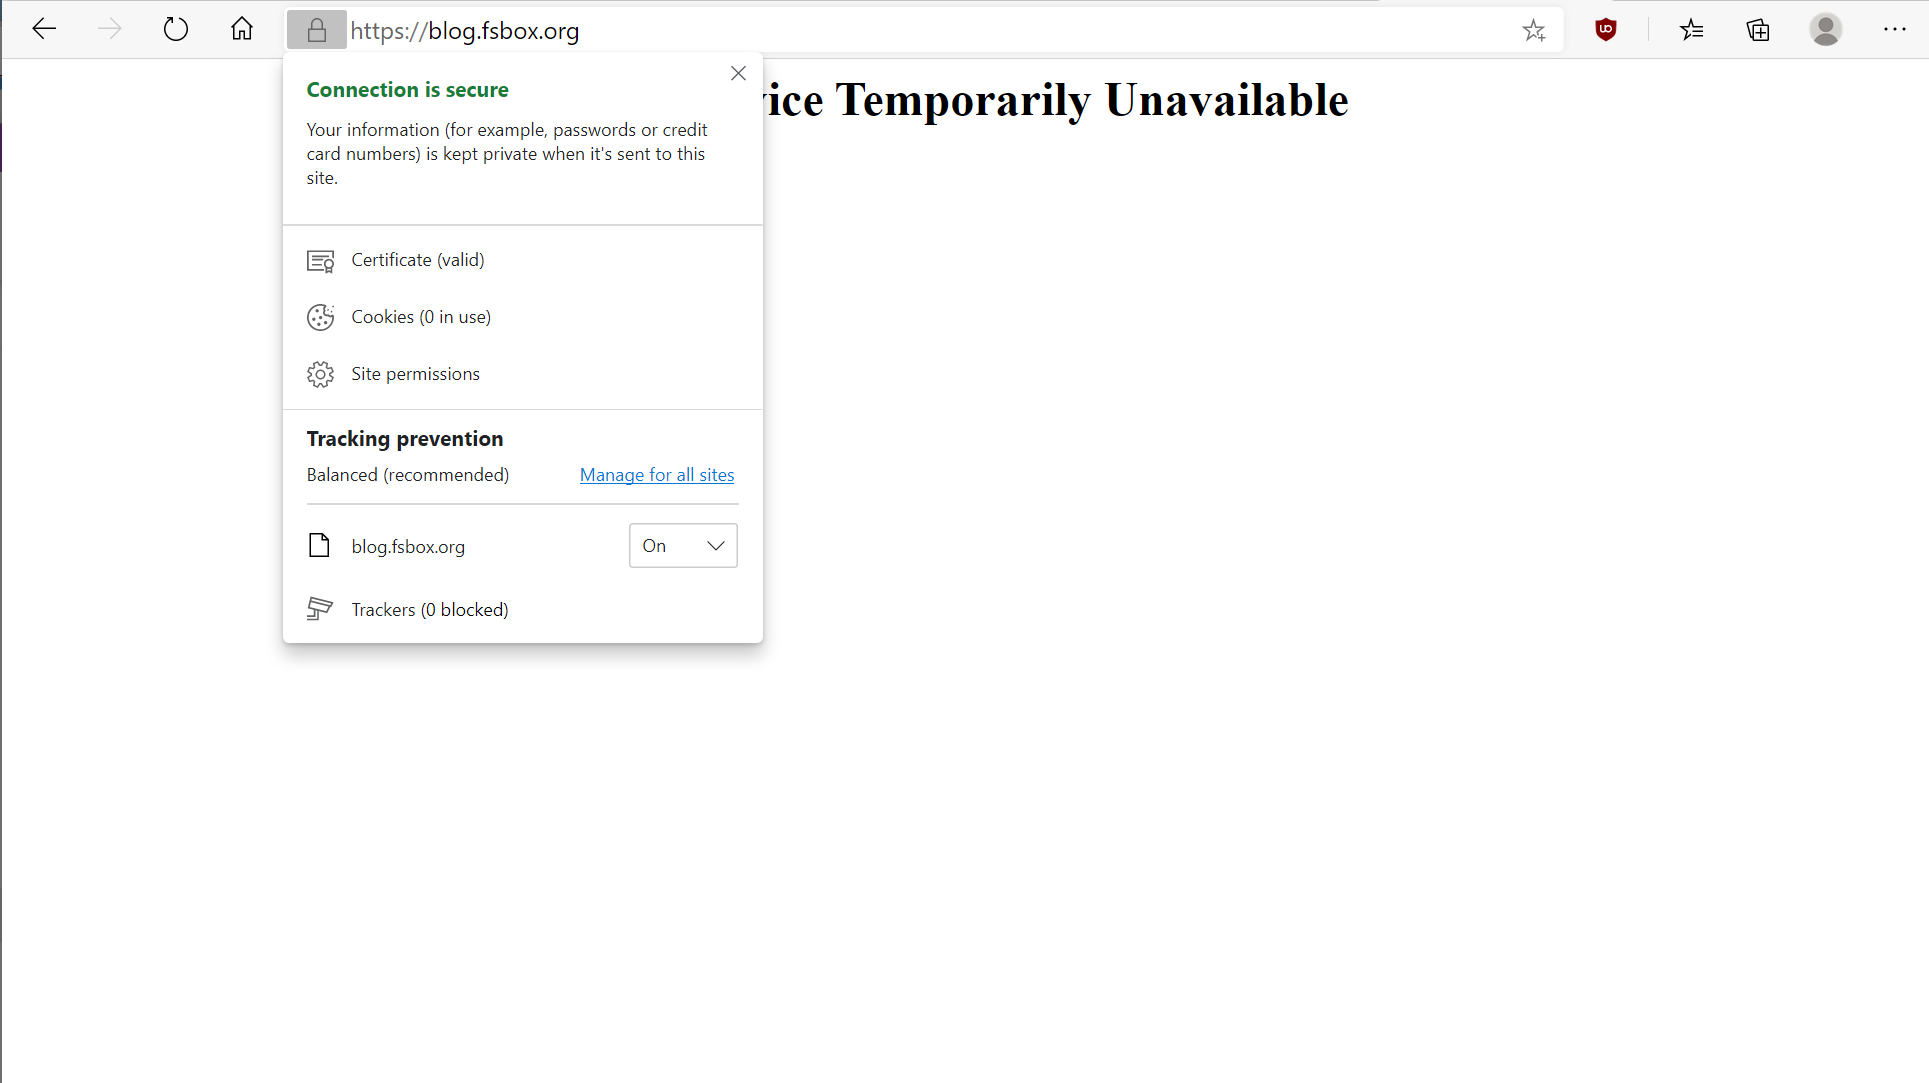
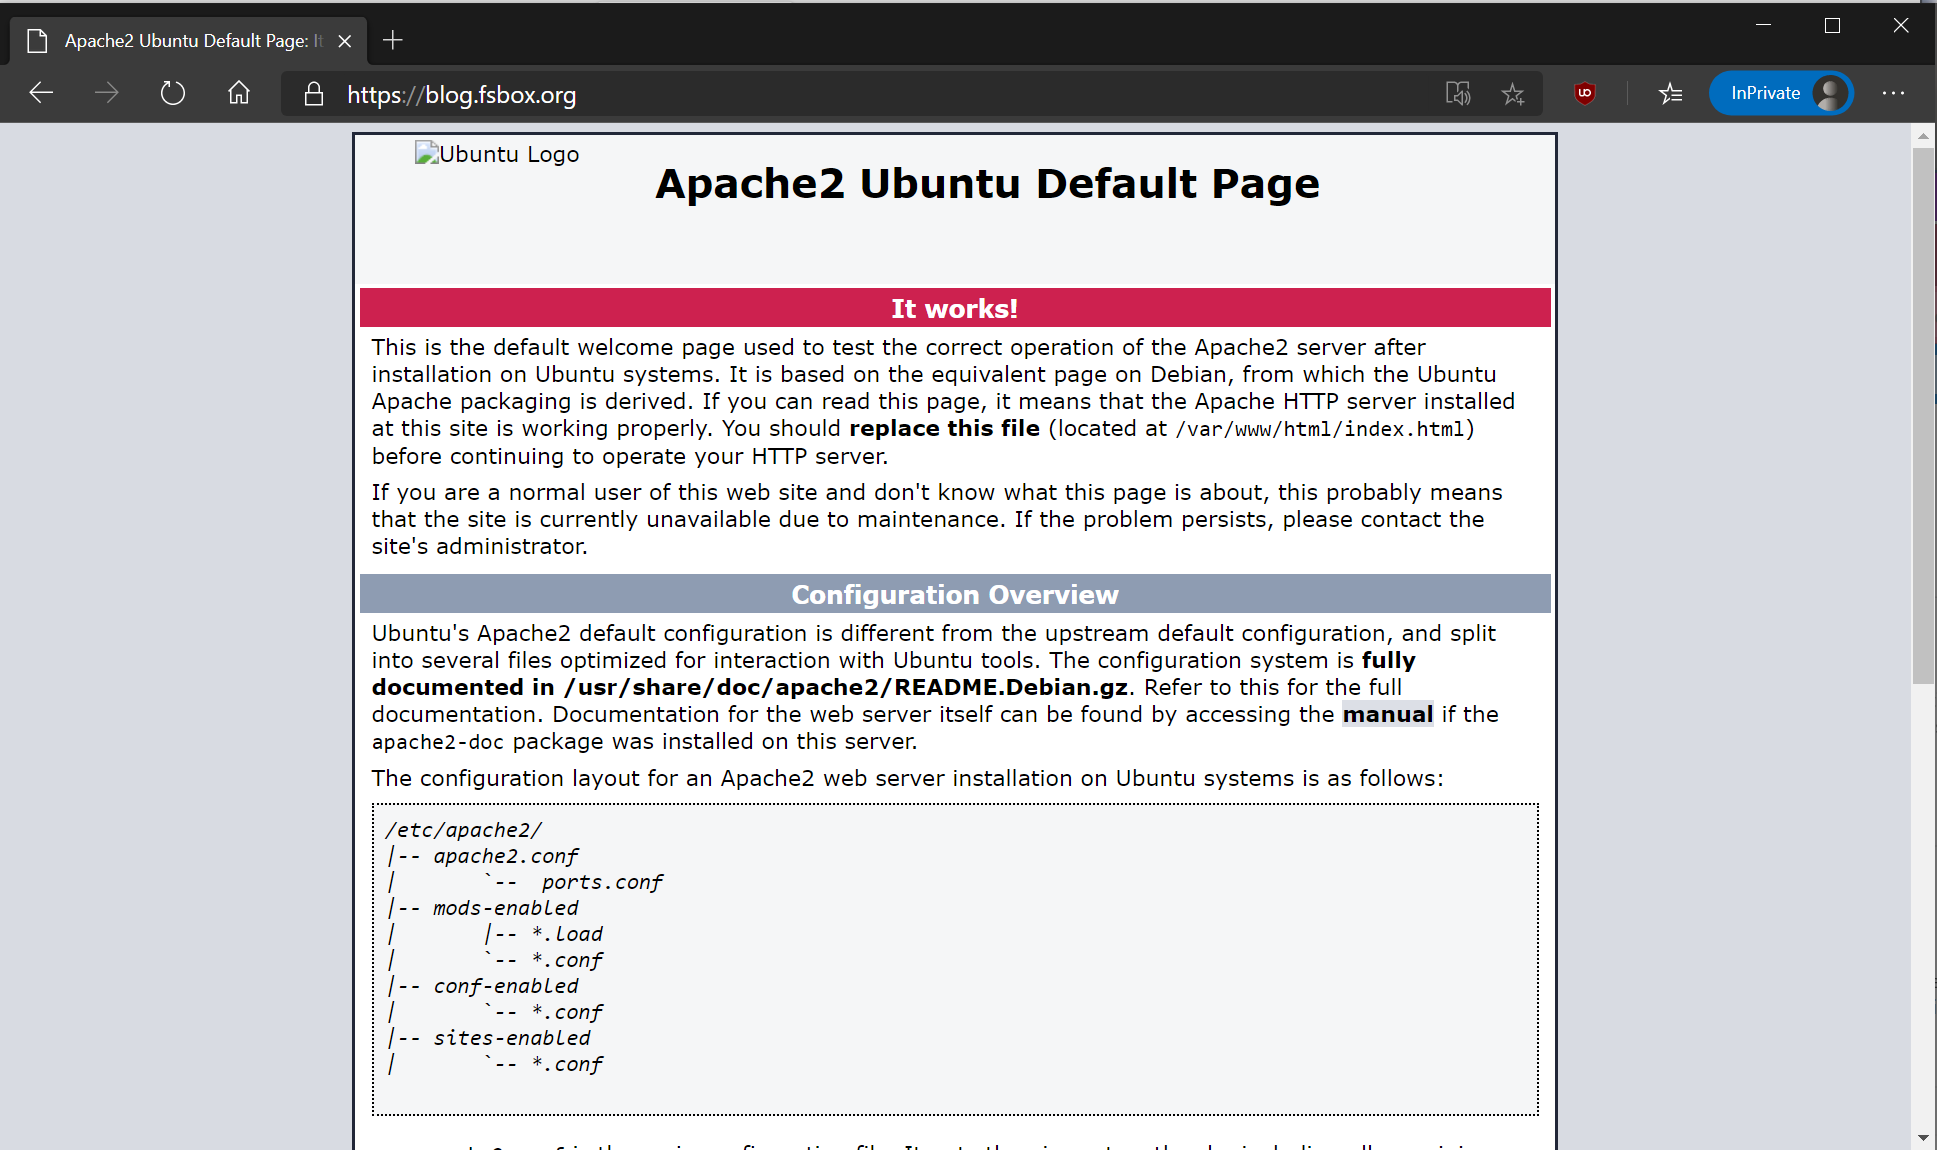
We haven't quite finished yet as there is still a security group change to go, but at this point should be able to test your DNS and certificate to make sure those are all correct by hitting the new load balancer. Because the back end isn't yet available you'll get a 503, but don't worry about that just yet:
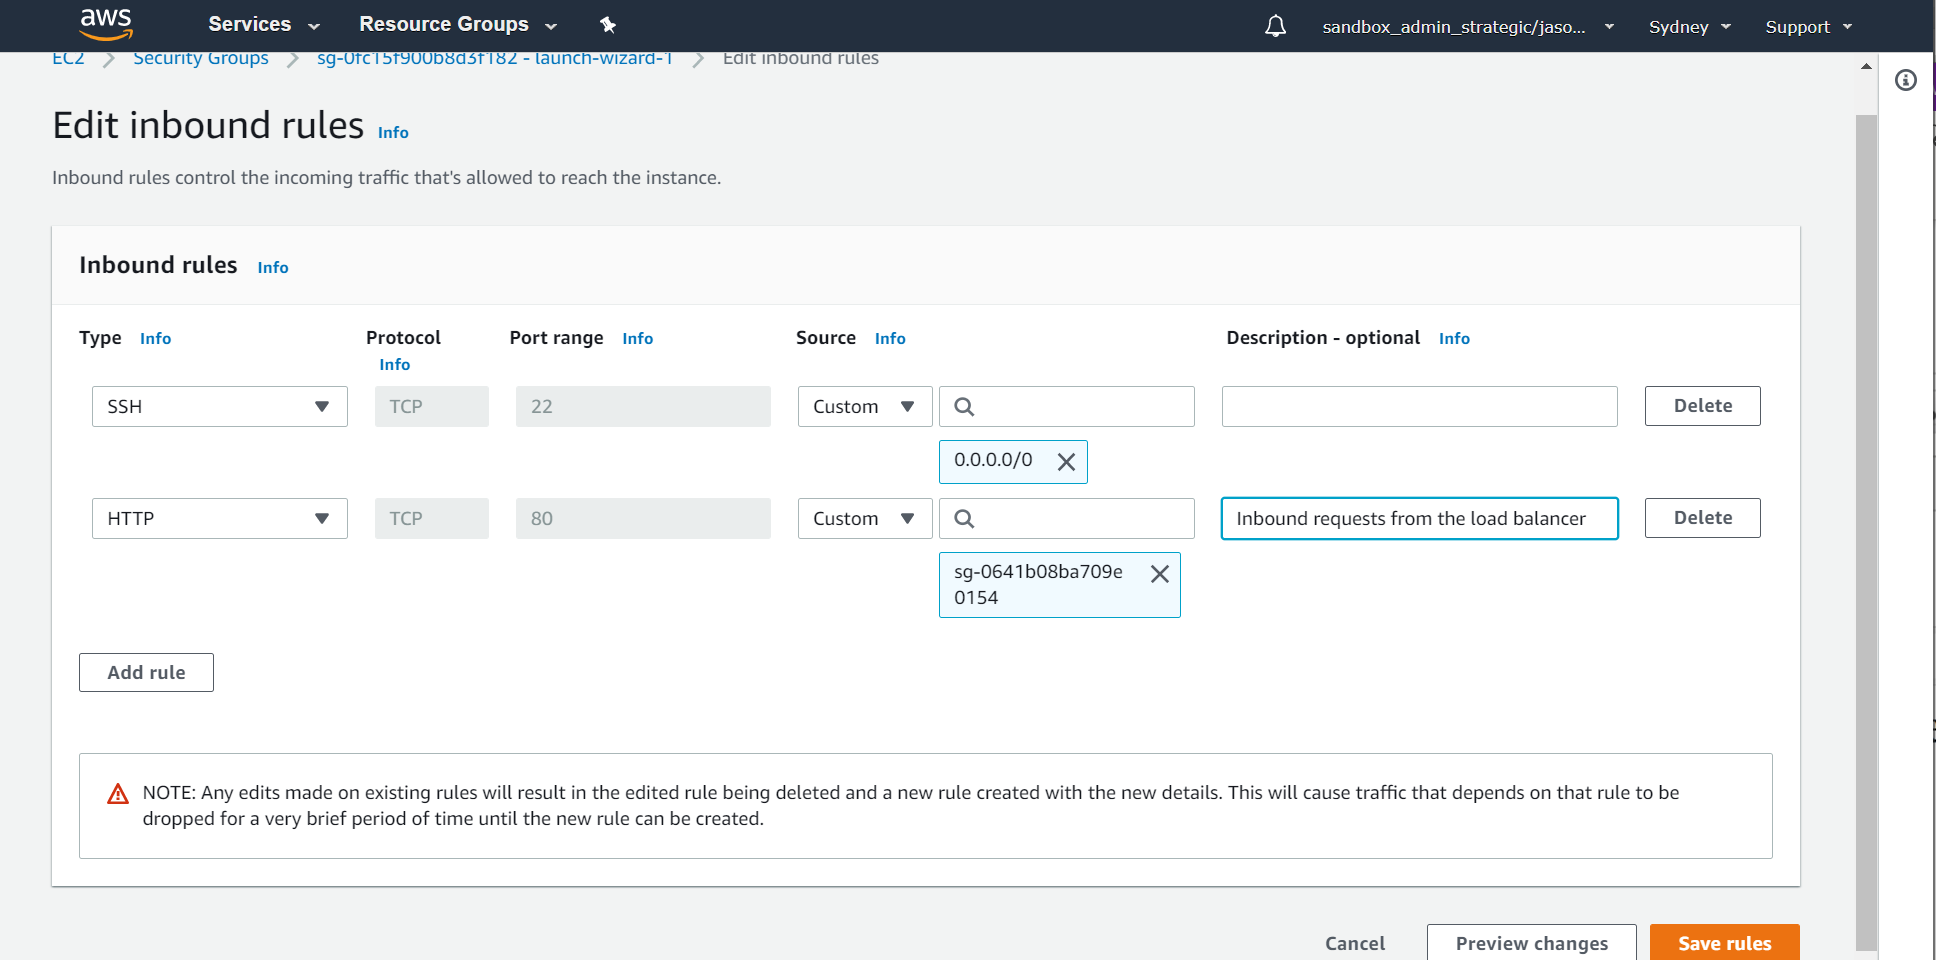
What's missing is the security group change to permit the load balancer to communicate with the web server on port 80. To do this, simply add a security group rule to the group attached to your webserver to permit port 80 from the load balancer security group (in this case that webserver's group is the default launch-wizard-1 group that was automatically created when I created the instance):
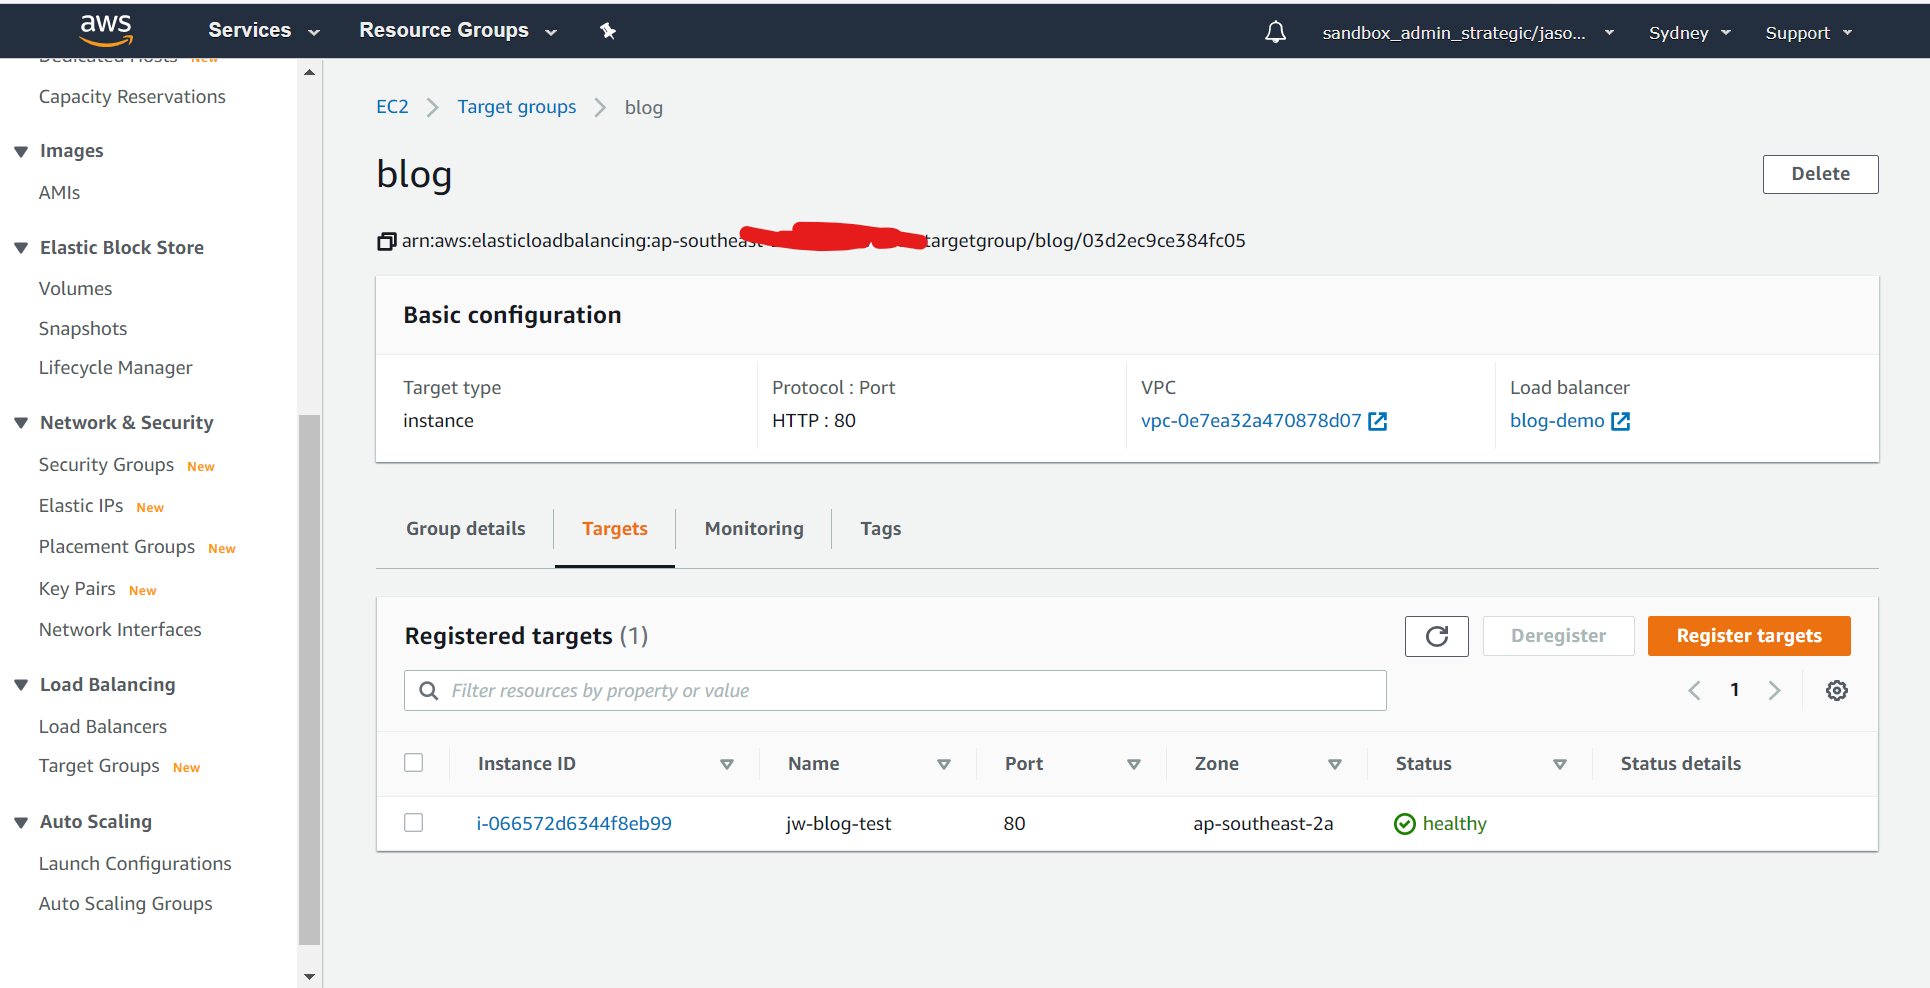
Now head back to the load balancer and look at the Target Group. After a few minutes if everything's been configured correctly so far you should have a healthy target webserver showing:
...and you should be able to see the new, fancy web page via the ALB:

Note: The default health check requires 5 successful checks before it will bring a target online. You can speed the process up a bit for testing by reducing that to 2 in the health check settings.
At this point if everything's looking good it's time to change cloud platforms and head over to Azure.
As mentioned earlier, you will need to be signed in with application administration permissions in Azure AD, or be working with an application that has been created for you and for which you have administration privileges. We're going to assume you have AAD admin and create the application. From the main Azure AD screen click "App Registrations" from the left-hand side and then "New Registration":
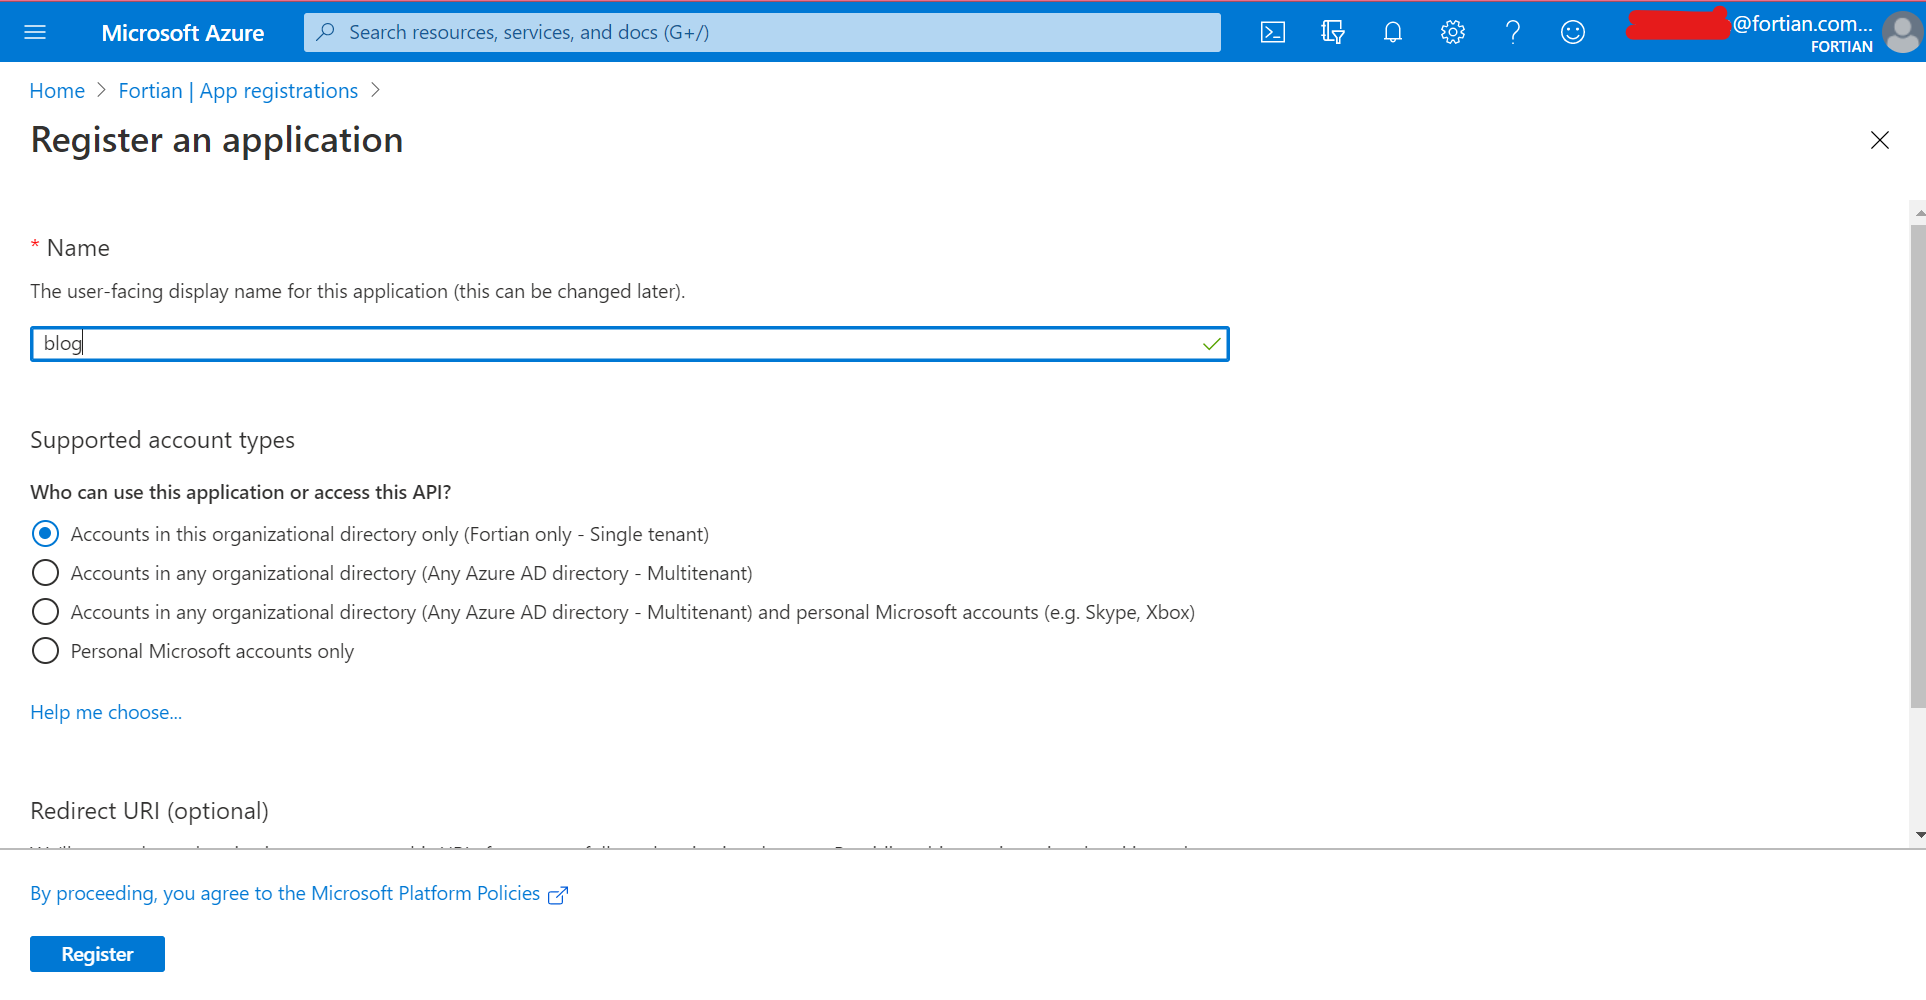
We're going to call our app "blog", and make it available to anyone in our Azure AD tenant.
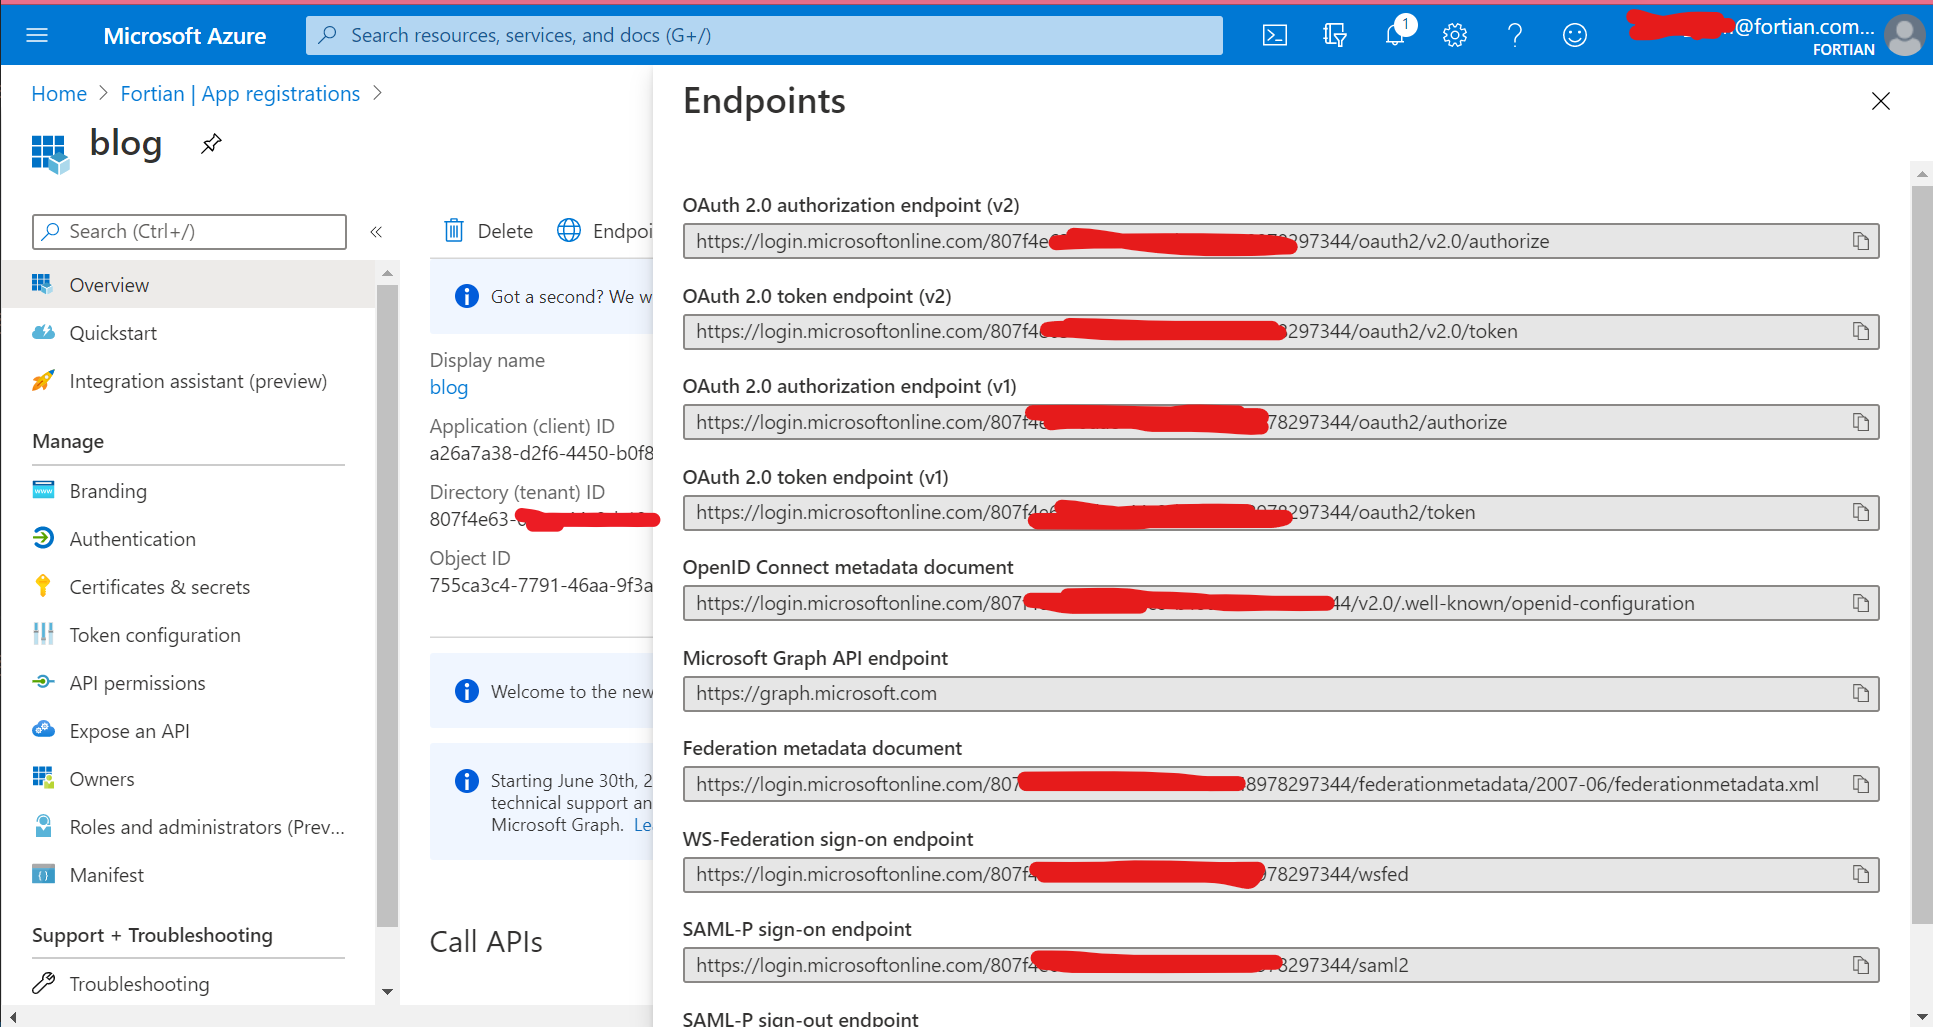
Next, click the Endpoints menu from the top of the screen and take a copy of the OpenID Connect metadata document - you're going to need the info in this to complete the AWS ALB configuration:
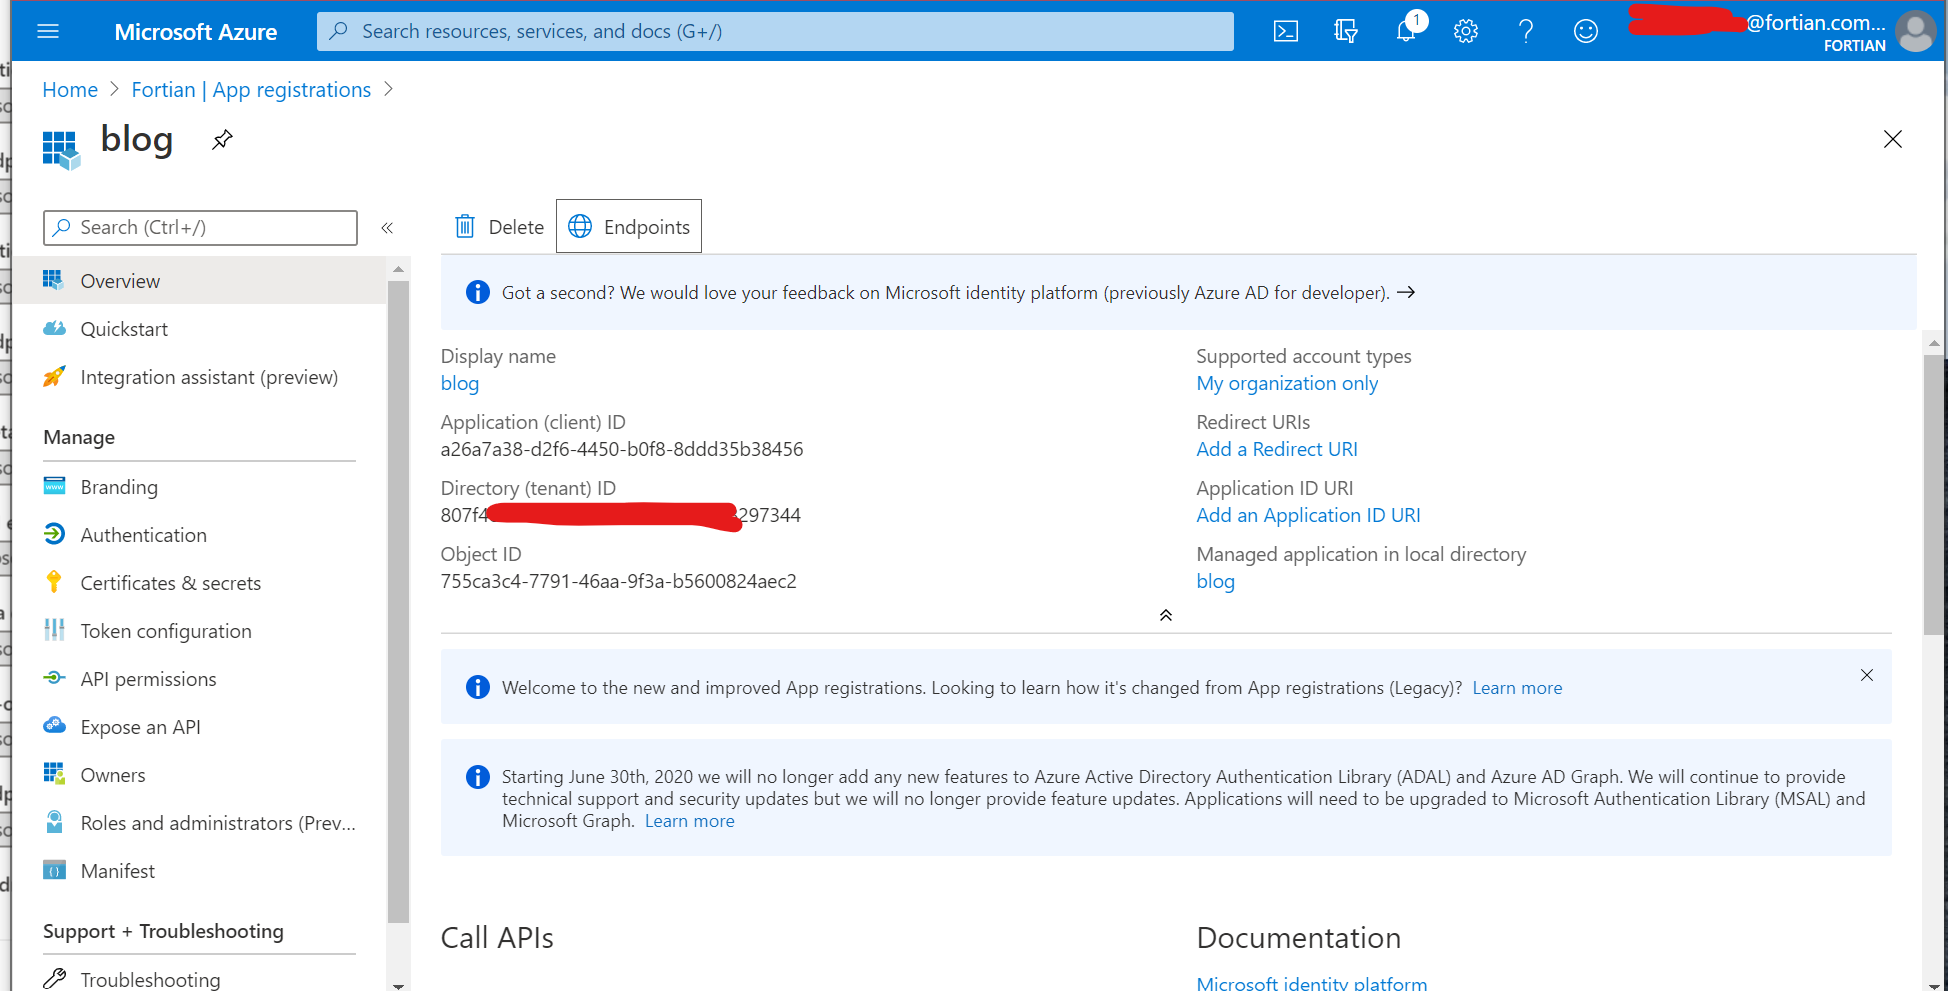
You're also going to need the application (client) ID, which is available from the overview page:
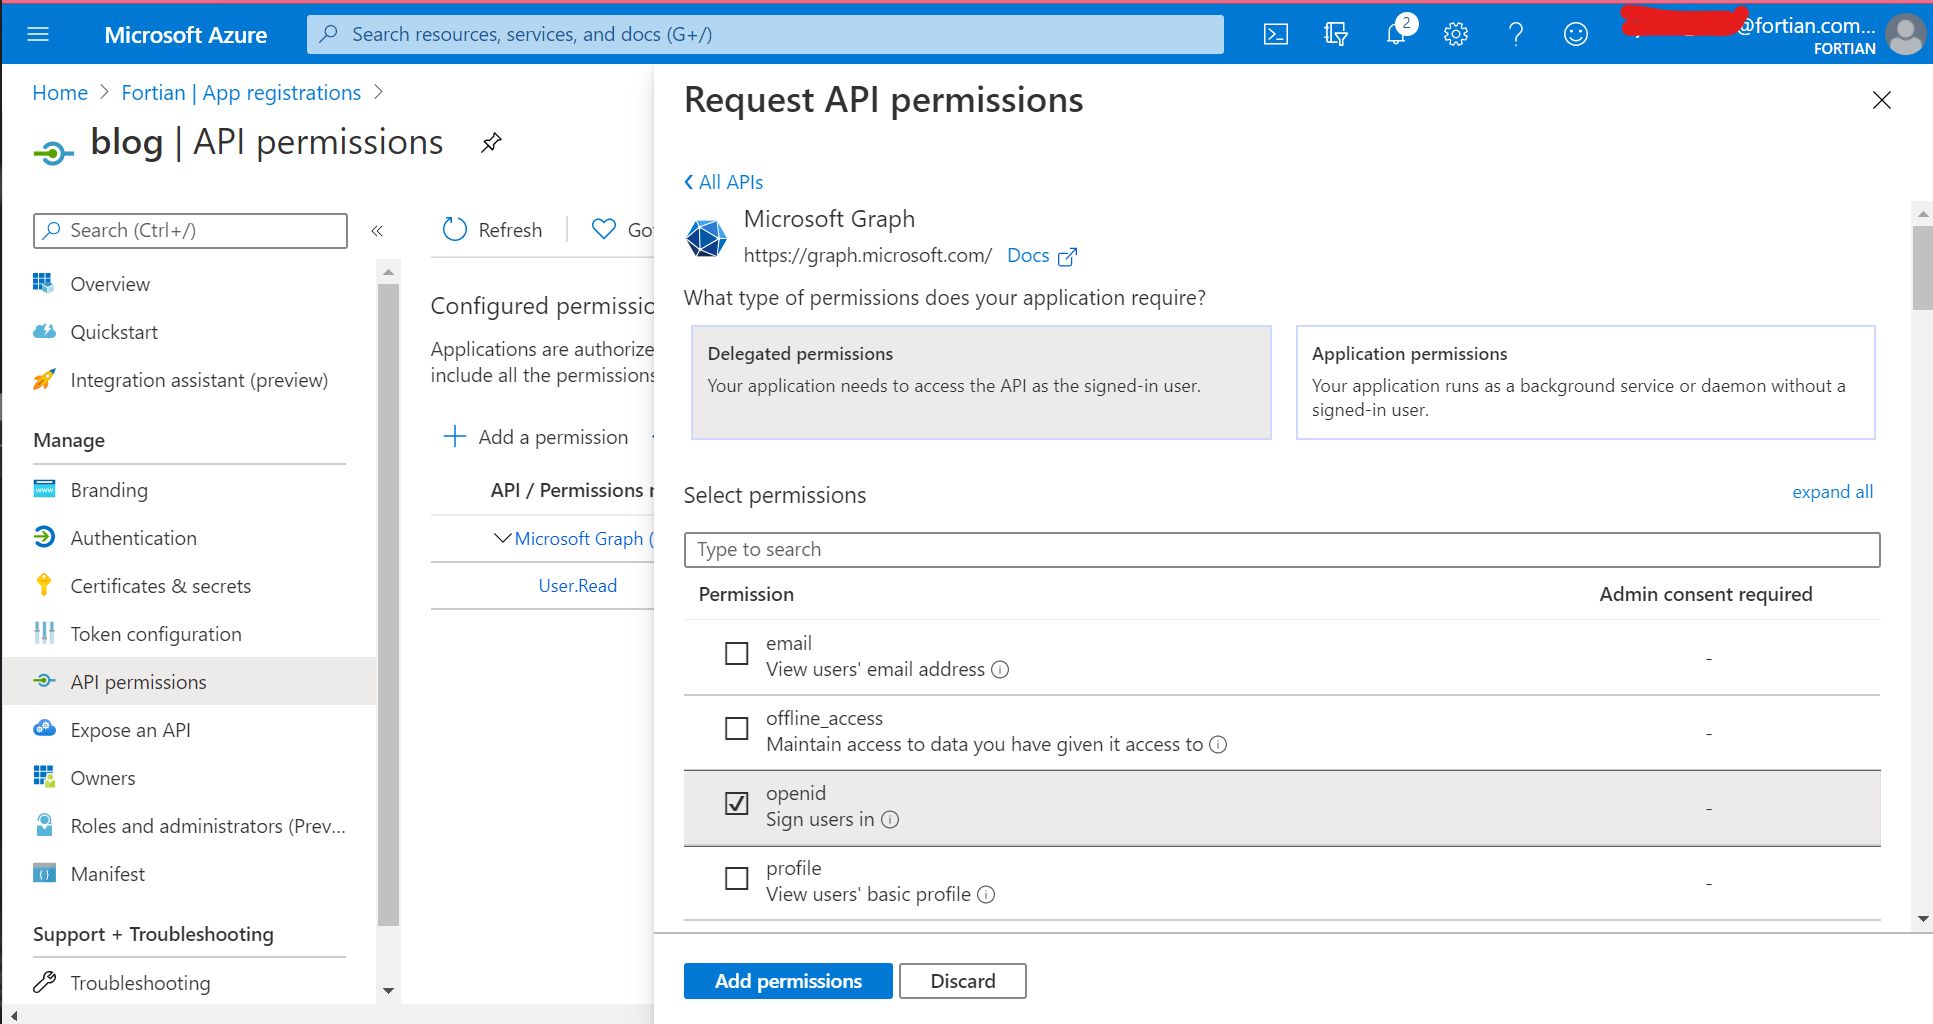
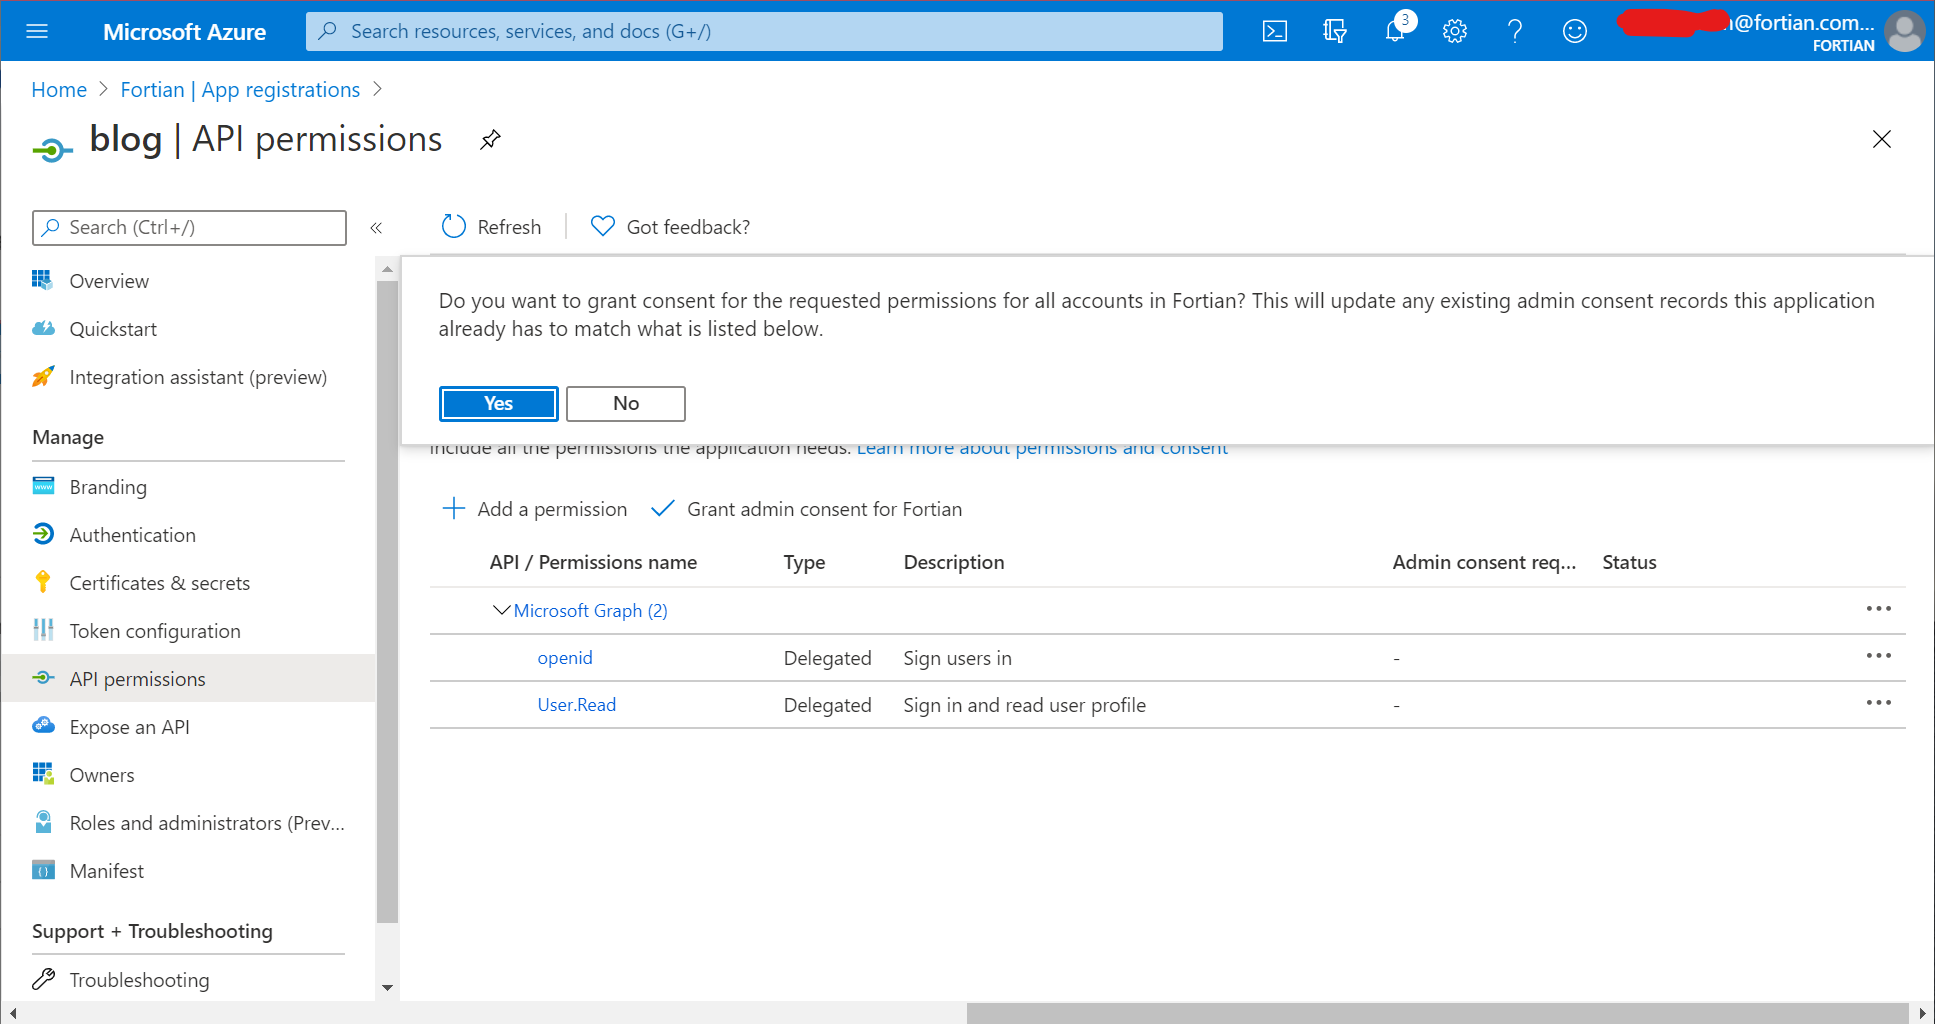
With that information copied somewhere, you now need to grant permissions for this app. Go to "API permissions" from the left-hand menu, then "Add a permission", "Microsoft Graph", "Delegated Permissions" and select the openid checkbox. It should end up looking like this:
Click "Add permissions" and then when you've returned to the API permissions screen click the "Grant admin consent for tenant name" button. If you skip this step, it'll still work, but users will have to individually approve the relevant access the first time they access the application:
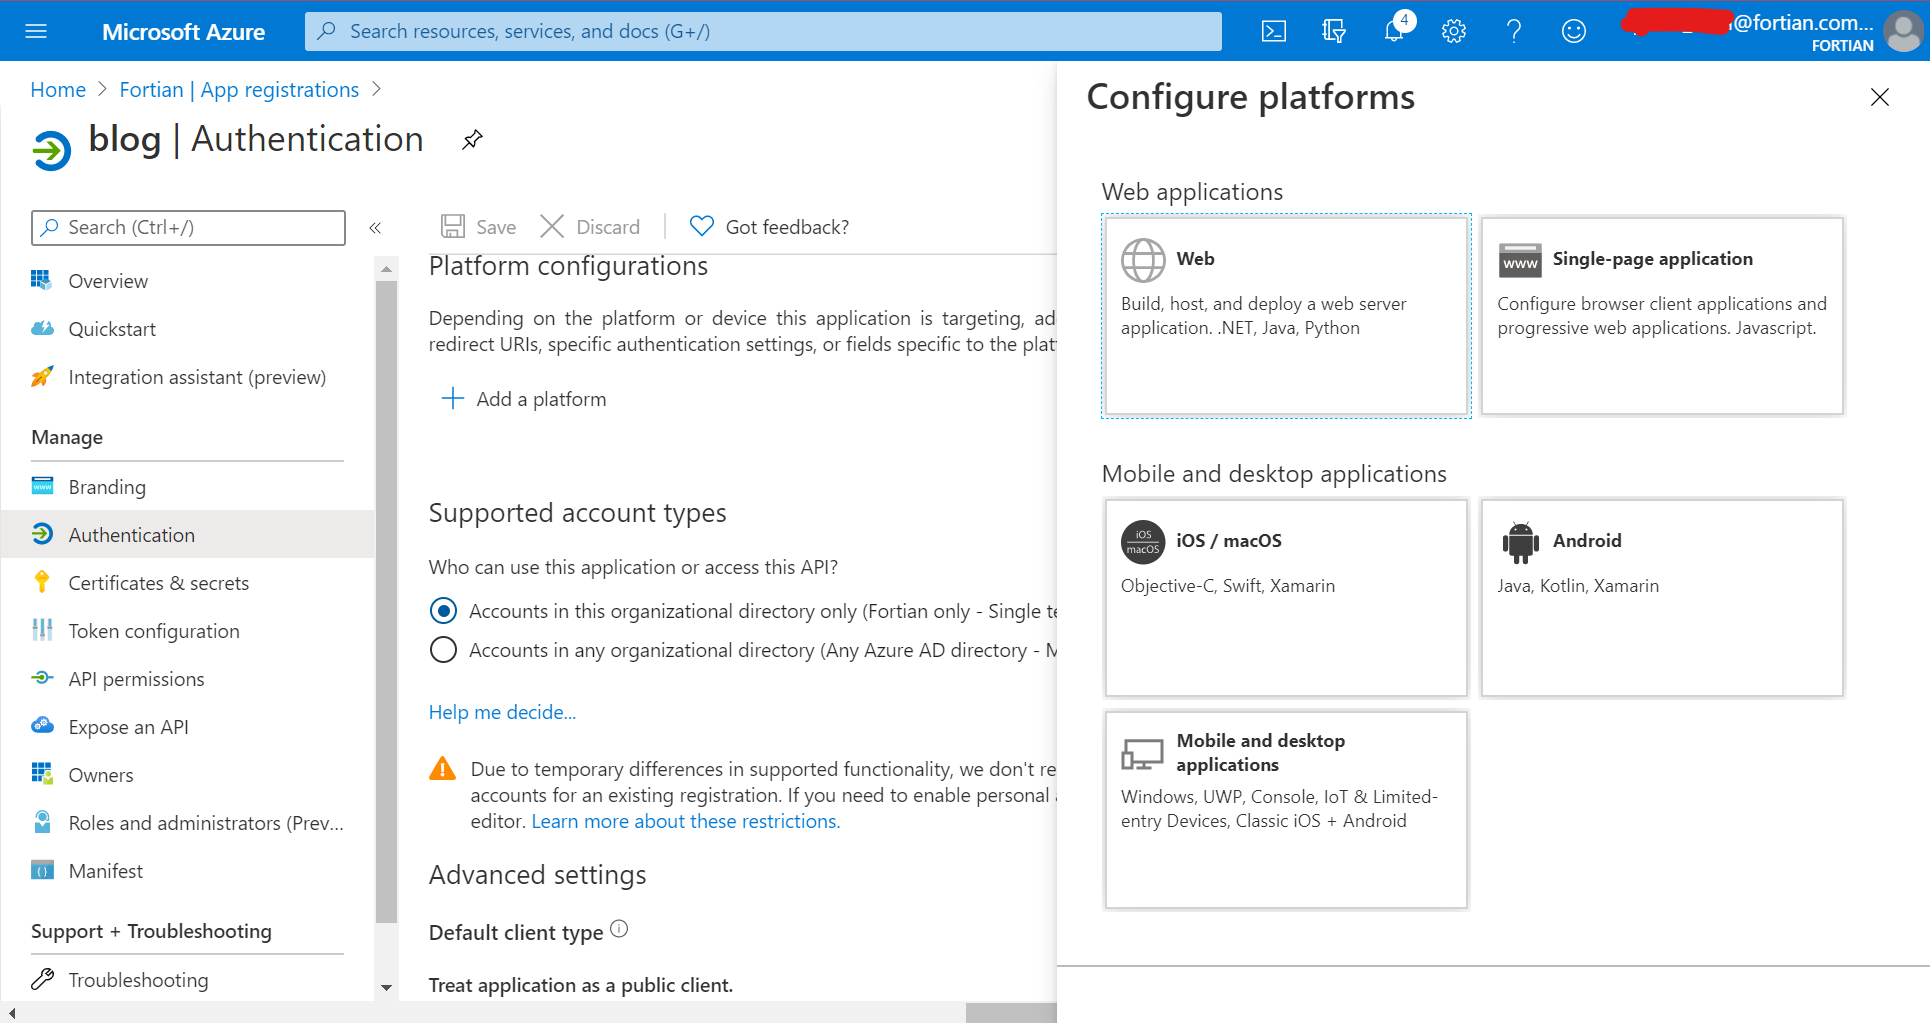
Next we need to define the redirect URI. To do this, go to "Authentication" from the left-hand menu, then "Add Platform" and then "Web":
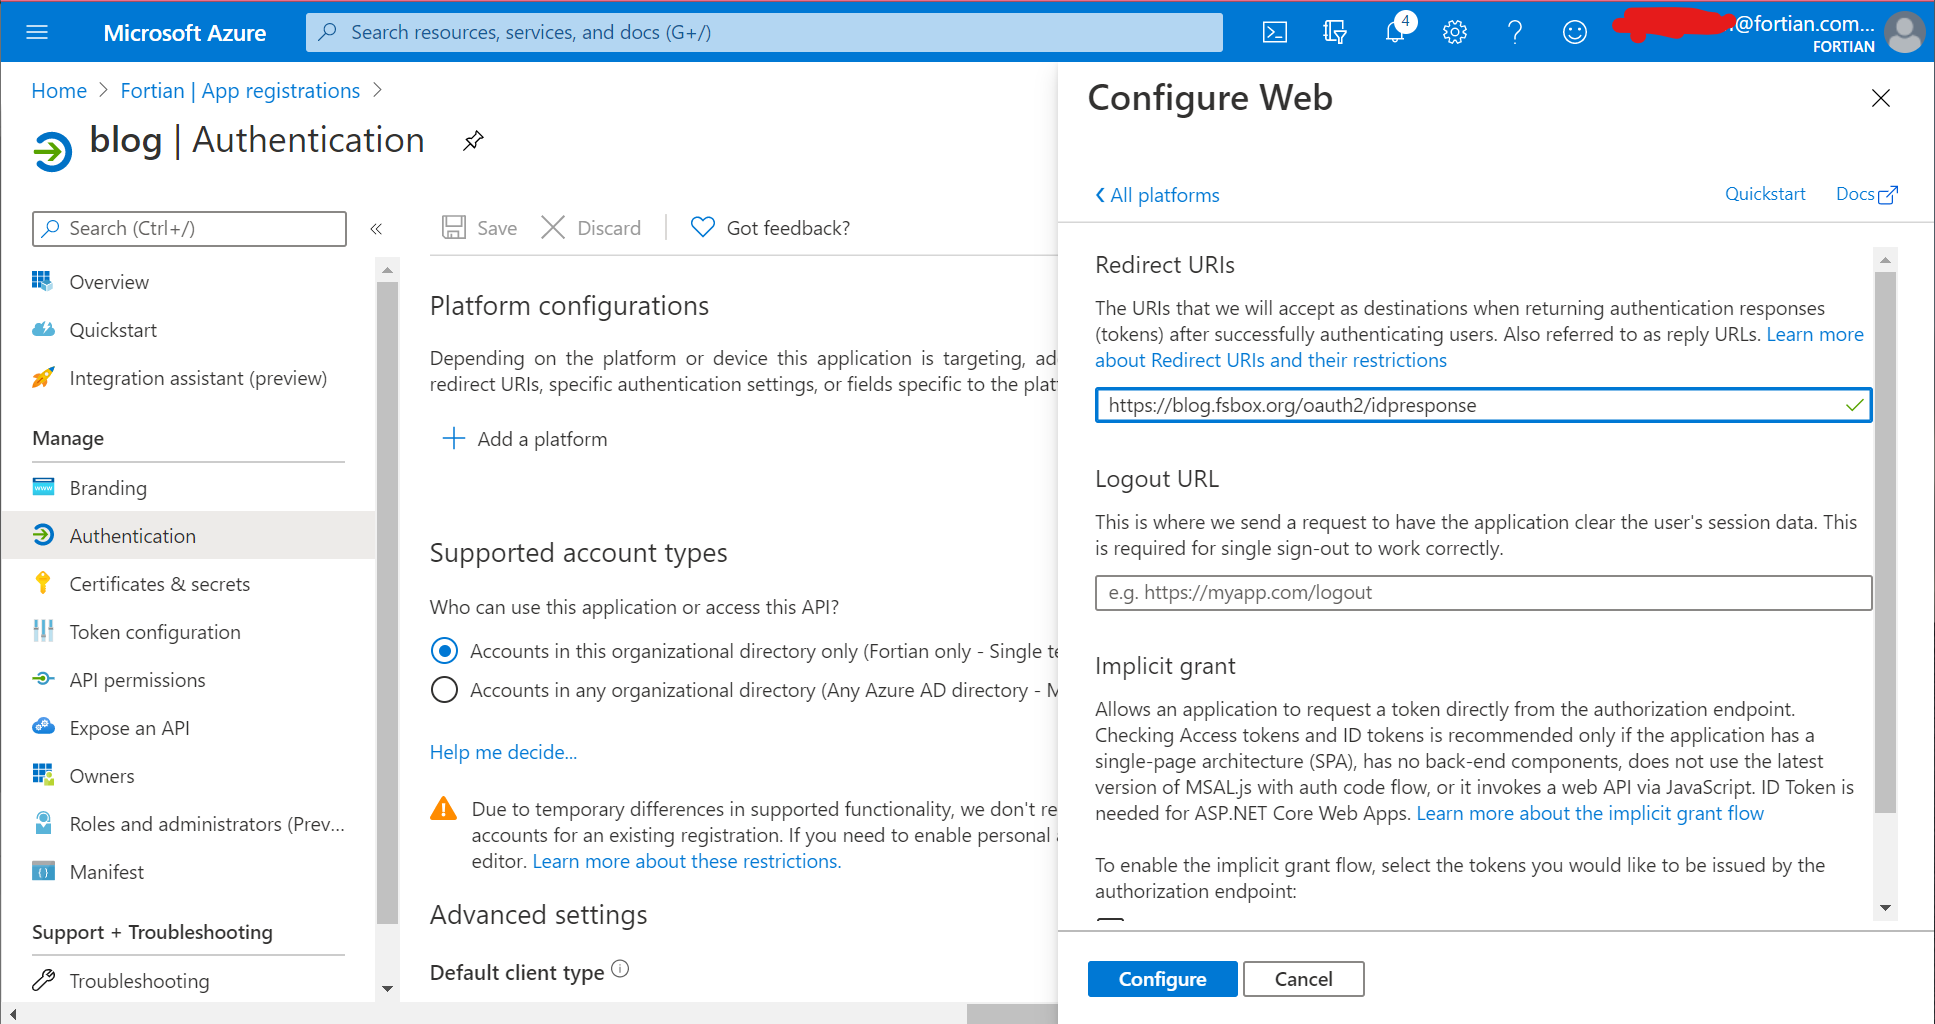
In the web configuration, set the redirect URI. It should be the DNS name of your load balancer with /oauth2/idpresponse appended as the path. So for this demo it's https://blog.fsbox.org/oauth2/idpresponse:
The last thing we need to do before heading back to AWS to continue working on the ALB is to create an application secret. Select "Certificates & secrets" from the left-hand menu and then "New client secret":
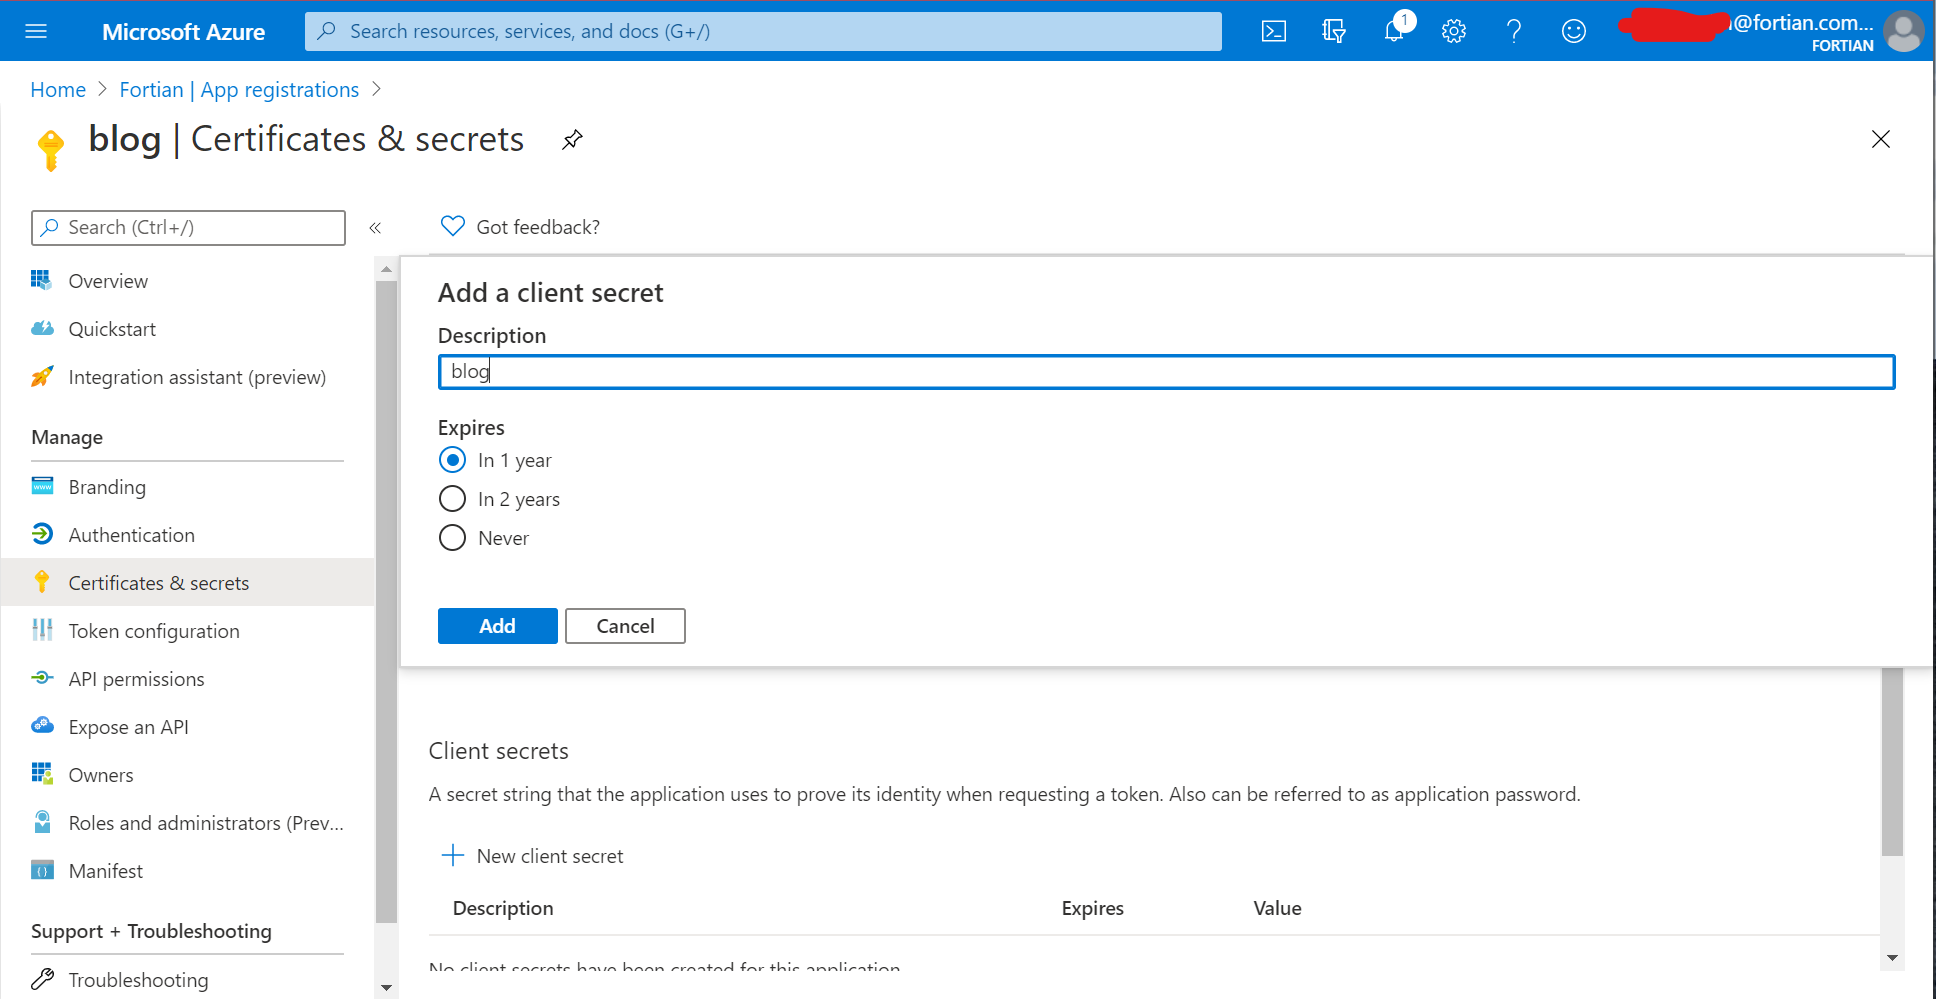
Make sure you've got a copy of your secret somewhere safe before heading back to the AWS console - the secret is only available for a short period of time after it's created, and after that you'll need to create a new one. Also for production make sure you pay attention to the expiry, that it's an appropriate length of time and is managed somewhere - setting a longer expiry time is great for availability, but not necessarily for security, and forgetting that you have an expiring secret is really really bad for availability...
So, back to the AWS console. Before we get into the load balancer configuration make sure you've got all of the relevant information ready. To help with debugging, here are all of the (redacted where appropriate) values for this demo:
Issuer:https://login.microsoftonline.com/807f4xxx-xxxx-xxxx-xxxx-xxxxxx297344/v2.0Authorization endpoint:https://login.microsoftonline.com/807f4xxx-xxxx-xxxx-xxxx-xxxxxx297344/oauth2/v2.0/authorizeToken endpoint:https://login.microsoftonline.com/807f4xxx-xxxx-xxxx-xxxx-xxxxxx297344/oauth2/v2.0/tokenUser info endpoint:https://graph.microsoft.com/oidc/userinfoClient ID:a26a7a38-d2f6-4450-b0f8-8ddd35b38456Client secret:secret from the previous step
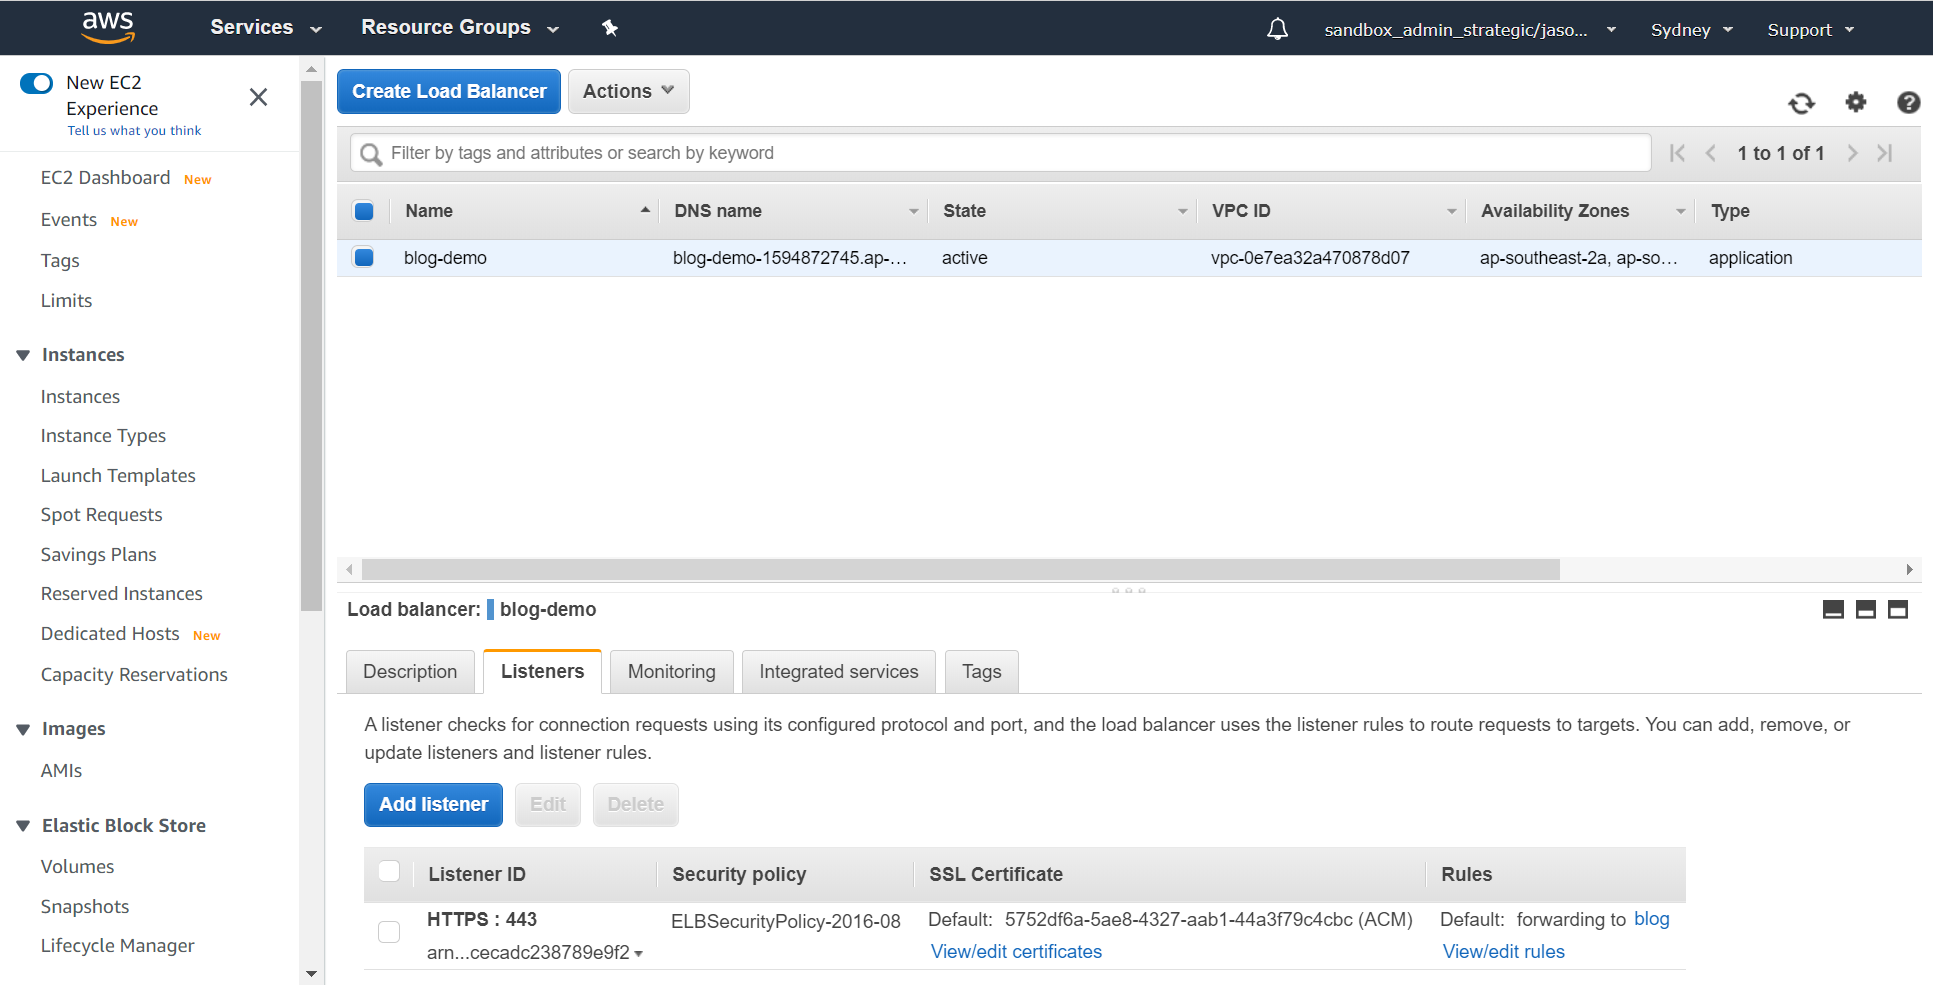
Now go back to the load balancer section in AWS, click on the "Listeners" tab for the load balancer you created in the earlier step and then click on "View/edit rules":
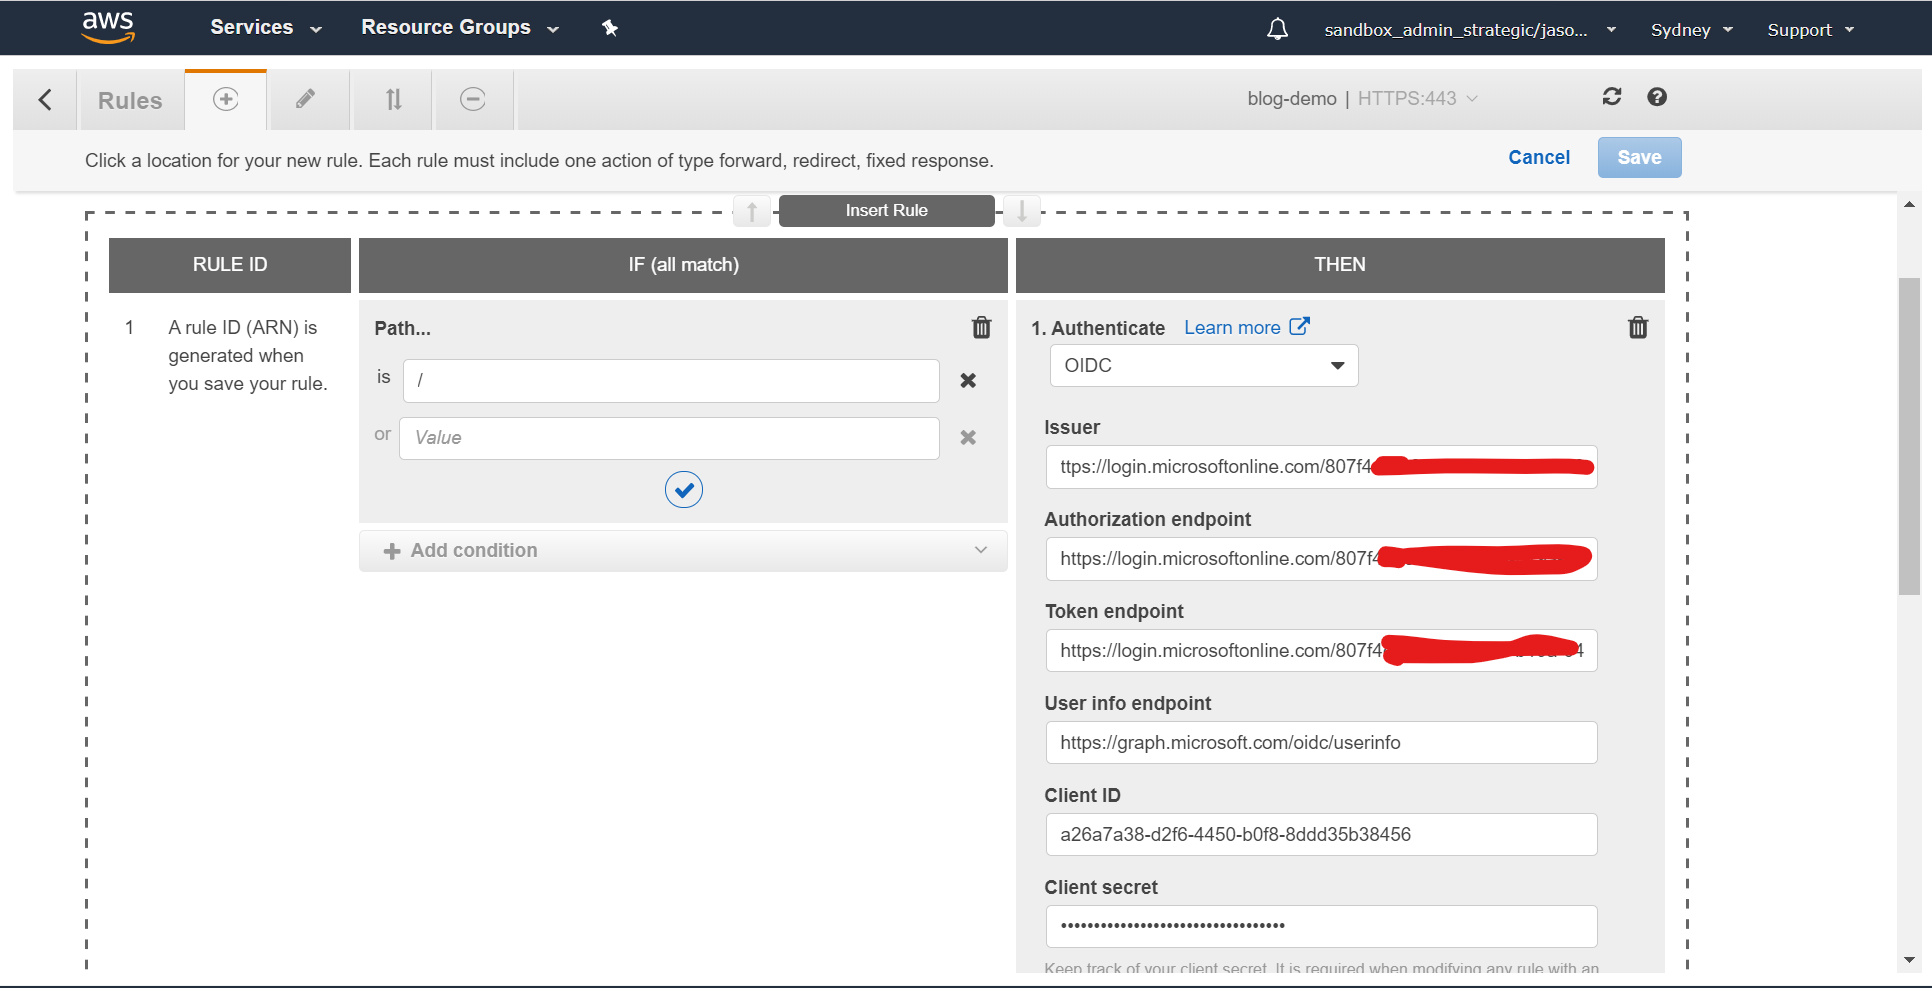
From there, click the plus button, then insert a new rule at the top of the list. The IF section should define the path is / and the THEN section should be configured to authenticate with OIDC, using the values above:
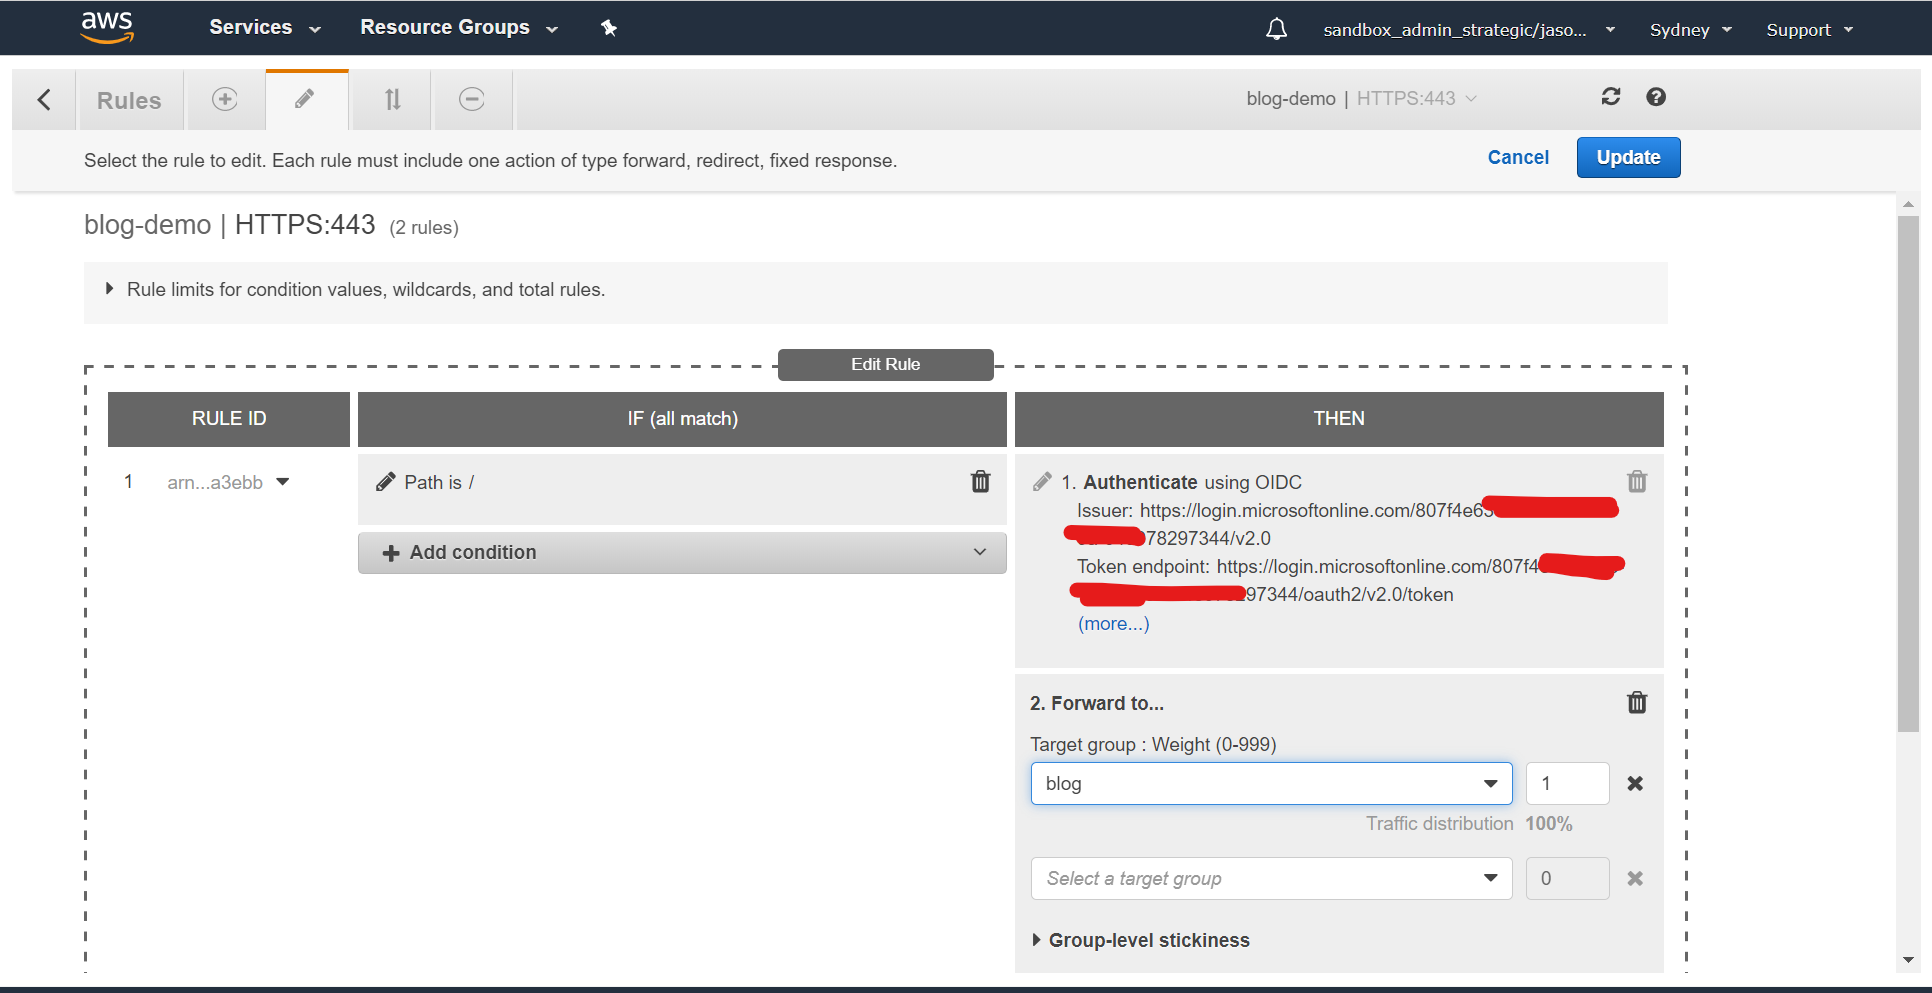
Now add second step to the THEN section, and configure it to forward to the target group - in this case "blog":
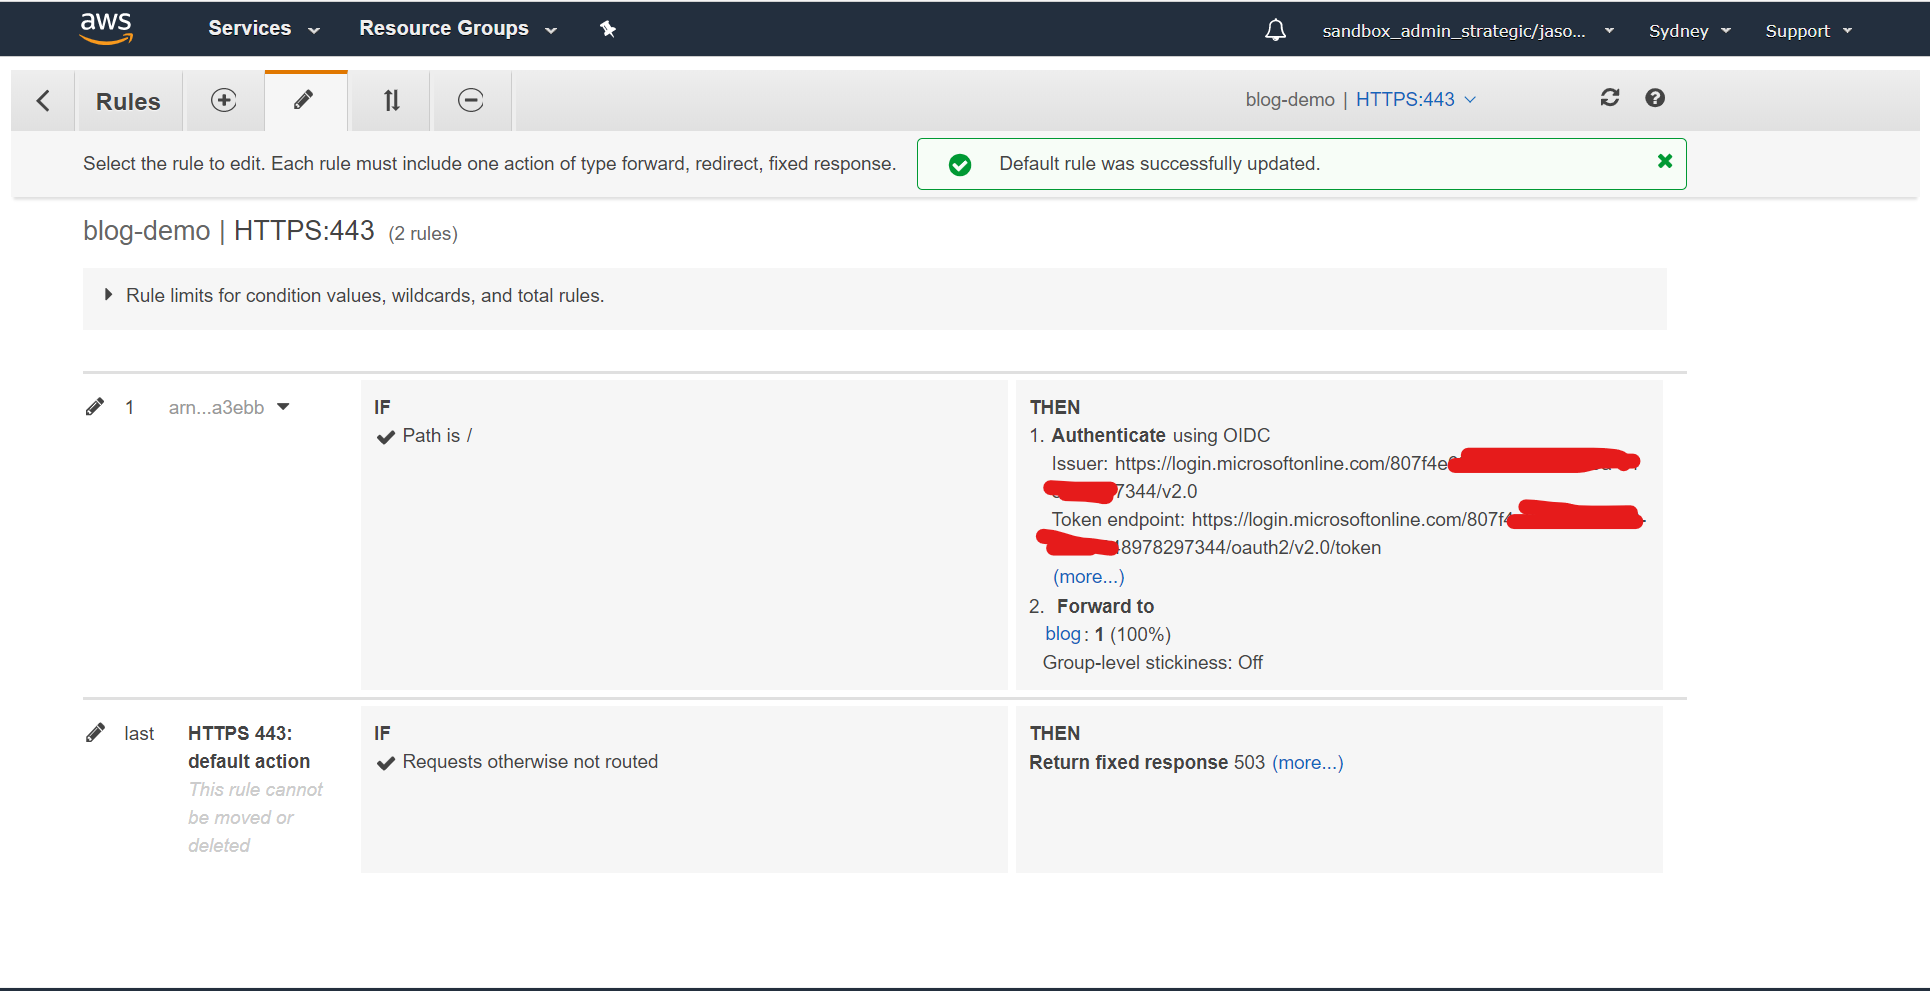
Finally, edit the last rule and change it to do anything other than access your content - so if anything above fails it'll fail closed, not open:
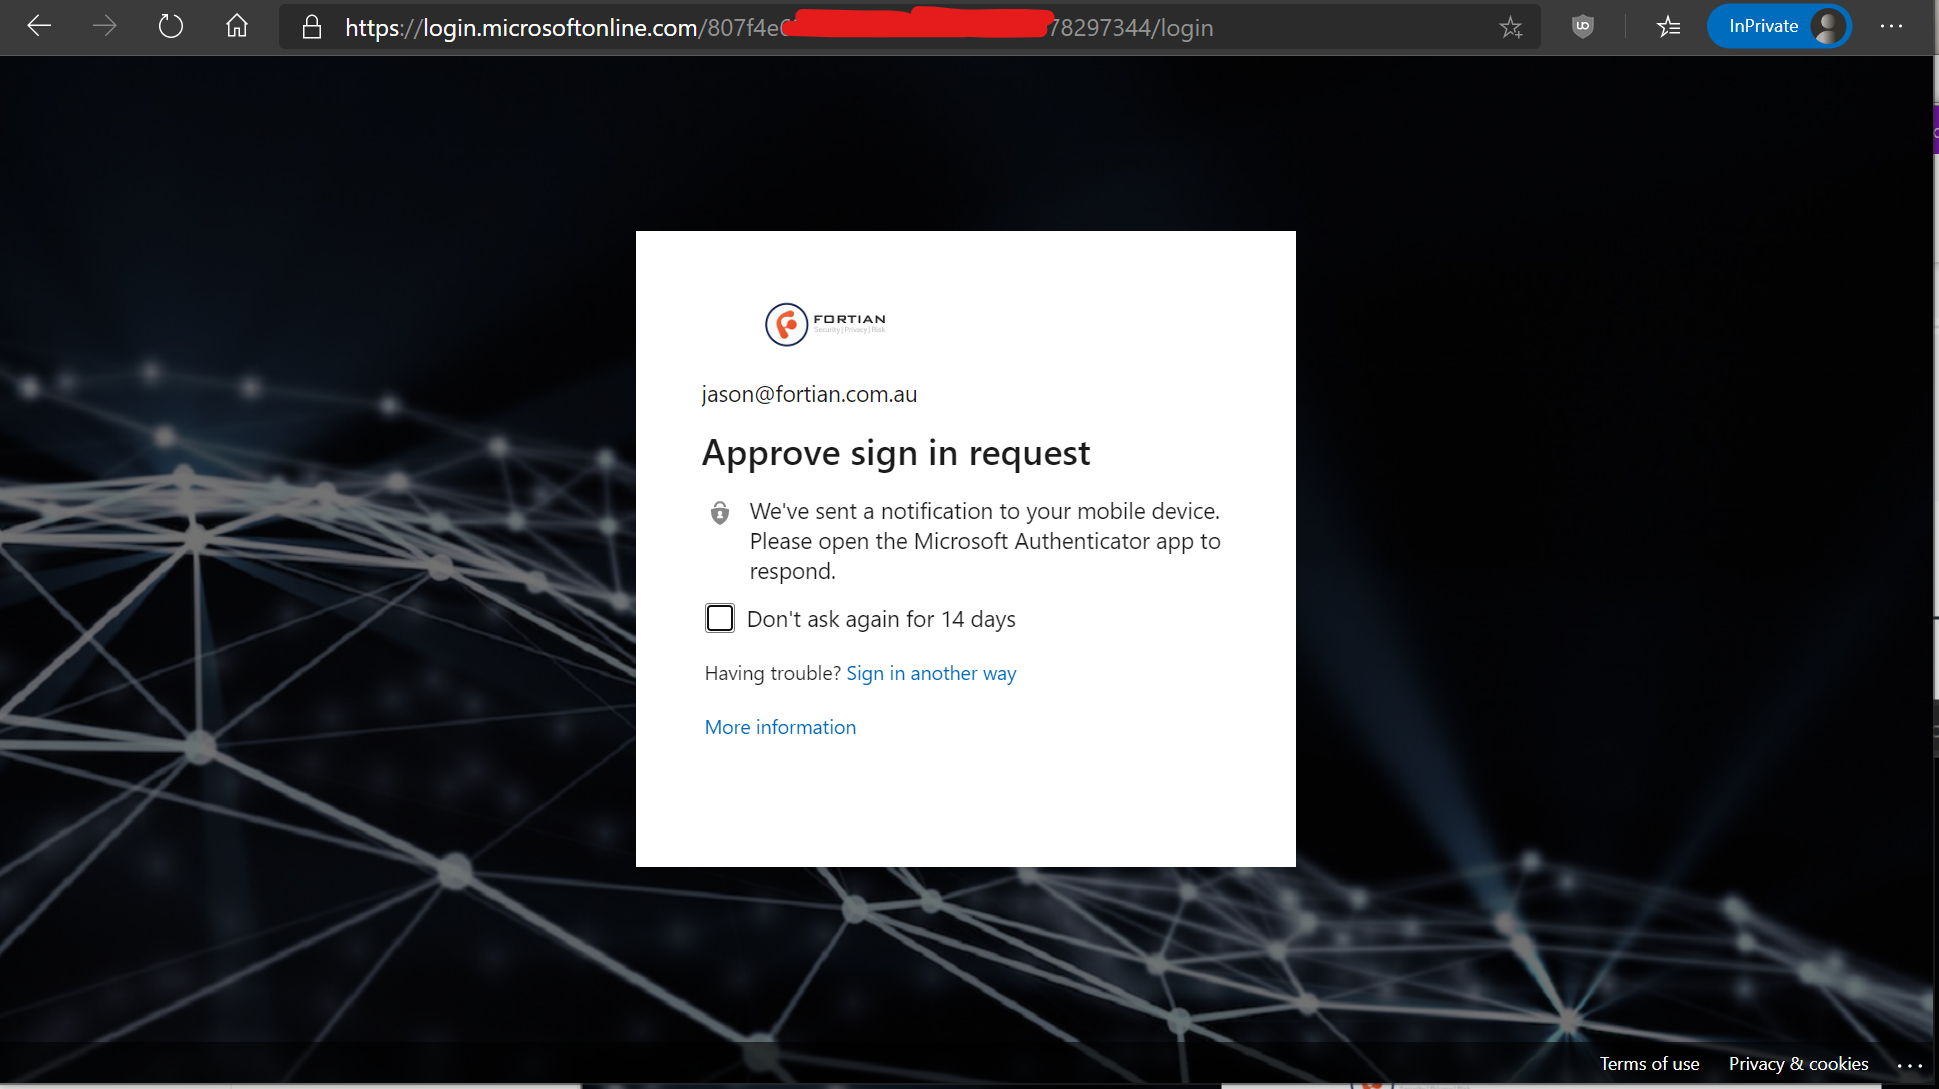
With all of that completed, it's time to cross your fingers, open an incognito/private browsing tab to ensure that you get a full end-to-end test, and head over to our new site. Instead of displaying the content straight to us, this time it should redirect to an Azure AD login screen:

And as I previously mentioned, one of the benefits of that is that you can also enforce all kinds of access policies including a multi-factor authentication requirement:
Which should then re-direct back to the ALB and provide access to our content:
Job done!
If you want to make it a bit more user friendly (and you don't have security requirements to the contrary, such as a decision to use HSTS for the site) , you can add an http listener on port 80 of the load balancer and set it to automatically redirect to https.
The default configuration in Azure AD is that any user in the directory will get access, which is great for broad filtering and attack surface reduction, but you can absolutely apply more strict configuration based on users and groups (as well as risk and conditional access policies if you're appropriately licensed). As I mentioned in the intro this can also then be tied into the application behind the ALB using OIDC or SAML.
Our internal services are fully orchestrated, and we have implemented something similar to the above configuration with Terraform. That's probably an opportunity for a future post, but if you're particularly interested or have any questions in the interim hit me up for a chat about it.
As always, if you enjoy this kind of thing and are interested in working with us please check out our careers page.
Request a consultation with one of our security specialists today or sign up to receive our monthly newsletter via email.
Get in touch Sign up!